Dashboard Overview
The Dashboard is the central control hub of My LifeVault. It presents key statistics about your database (total files, expiring soon items, expired items, family members) and lists upcoming notifications chronologically.
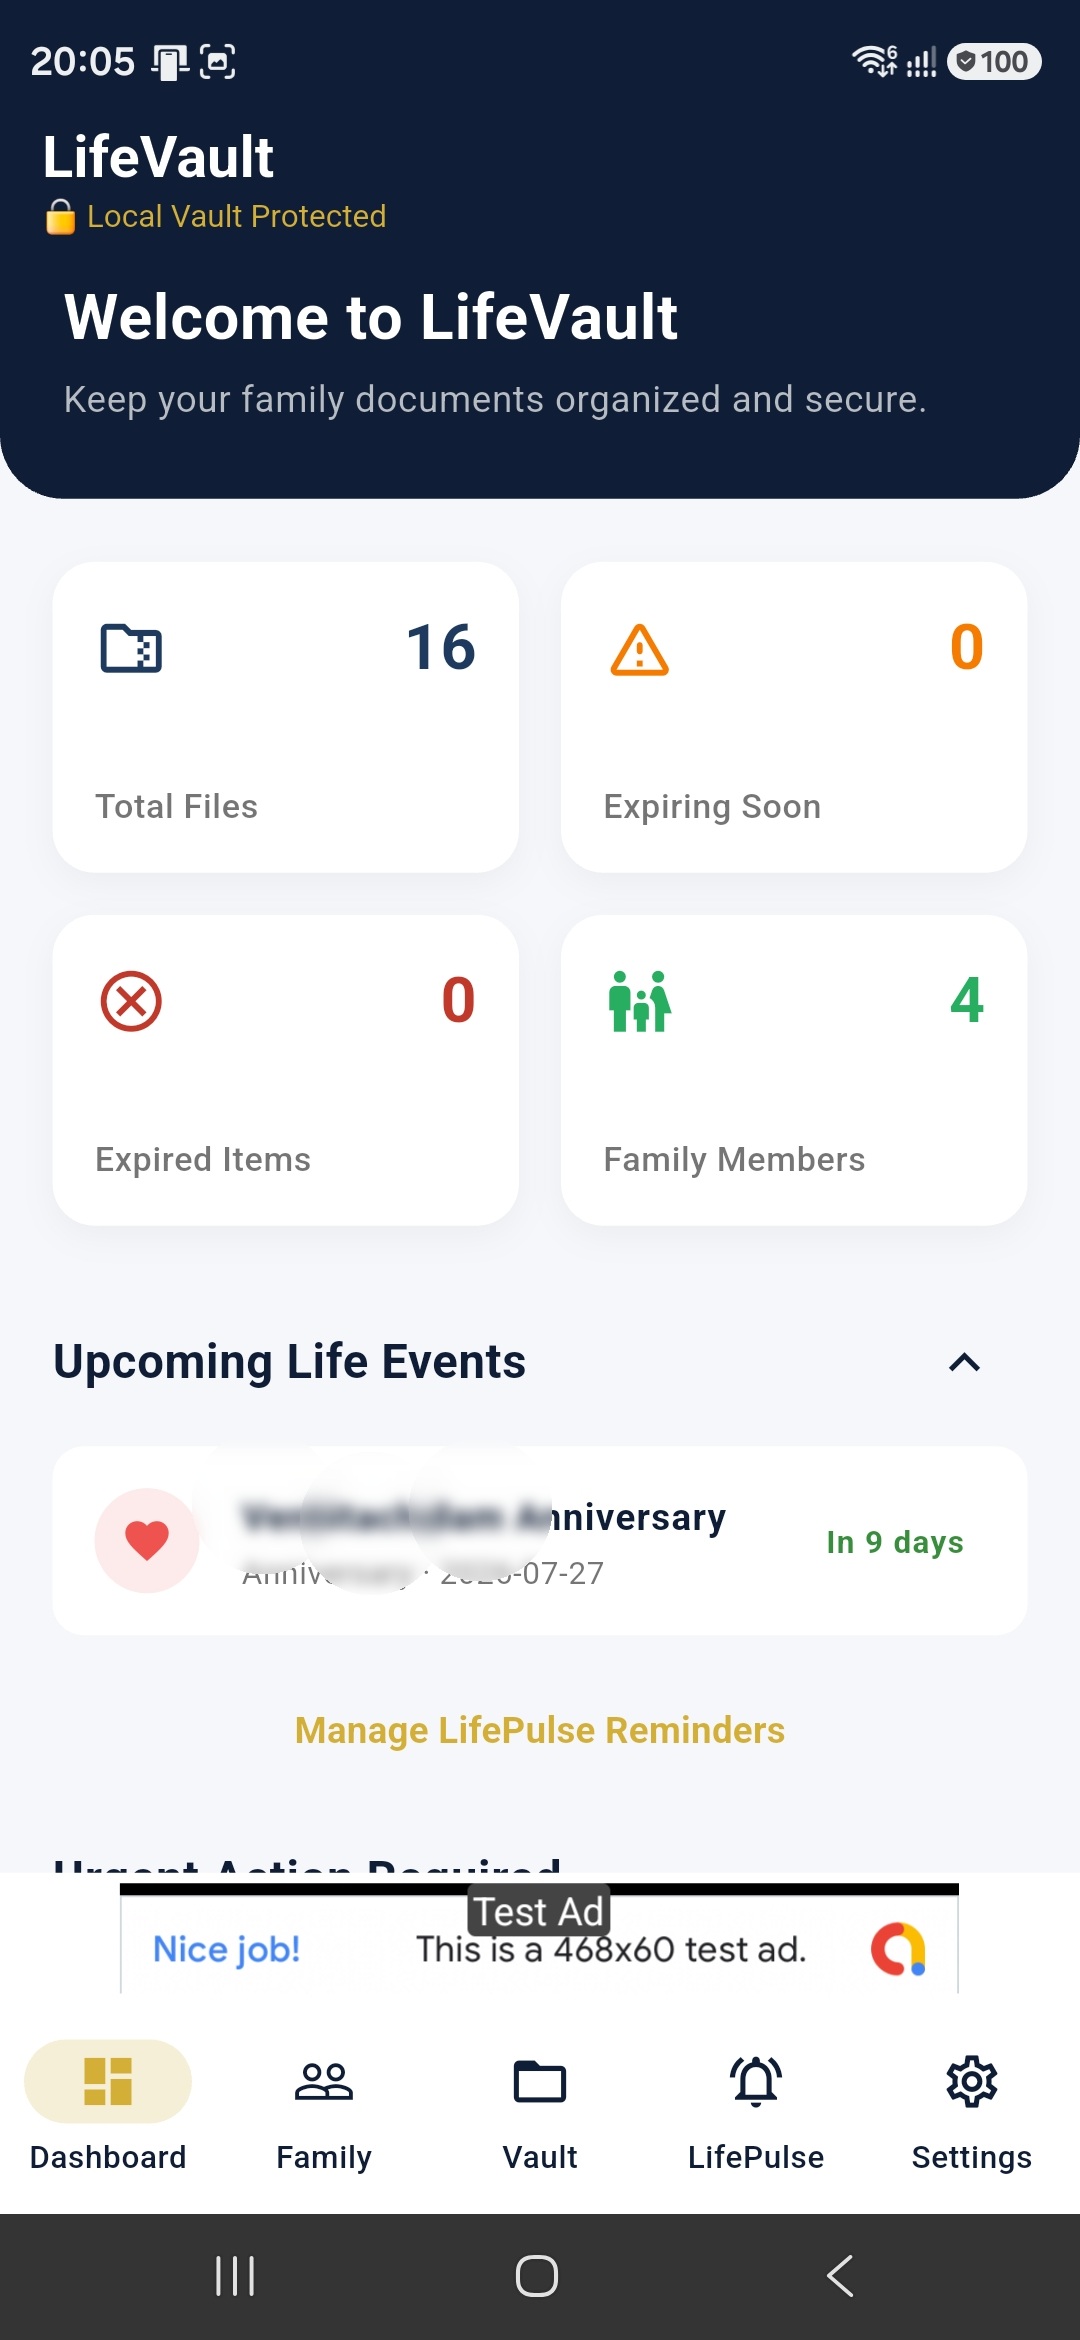
Figure 1: Main Dashboard Screen showing quick stats and upcoming events (masked details).
Click-to-Navigate Features:
Tapping cards on the dashboard redirects you automatically to resolve actions:
- Total Files Card: Opens the My LifeVault with all items displayed.
- Expiring Soon/Expired Cards: Opens the My LifeVault with filtered views highlighting documents that need immediate action.
- Upcoming Event Items: Tapping birthday items opens the family member's details page; tapping custom events opens the LifePulse screen and opens the details popup immediately.
Managing Family Profiles
A family profile acts as an owner record. Before saving a document, you must set up at least one profile (e.g., "Self") in the Family space to link files, medical metadata, and emergency details.
Step 2.1: View Family Members
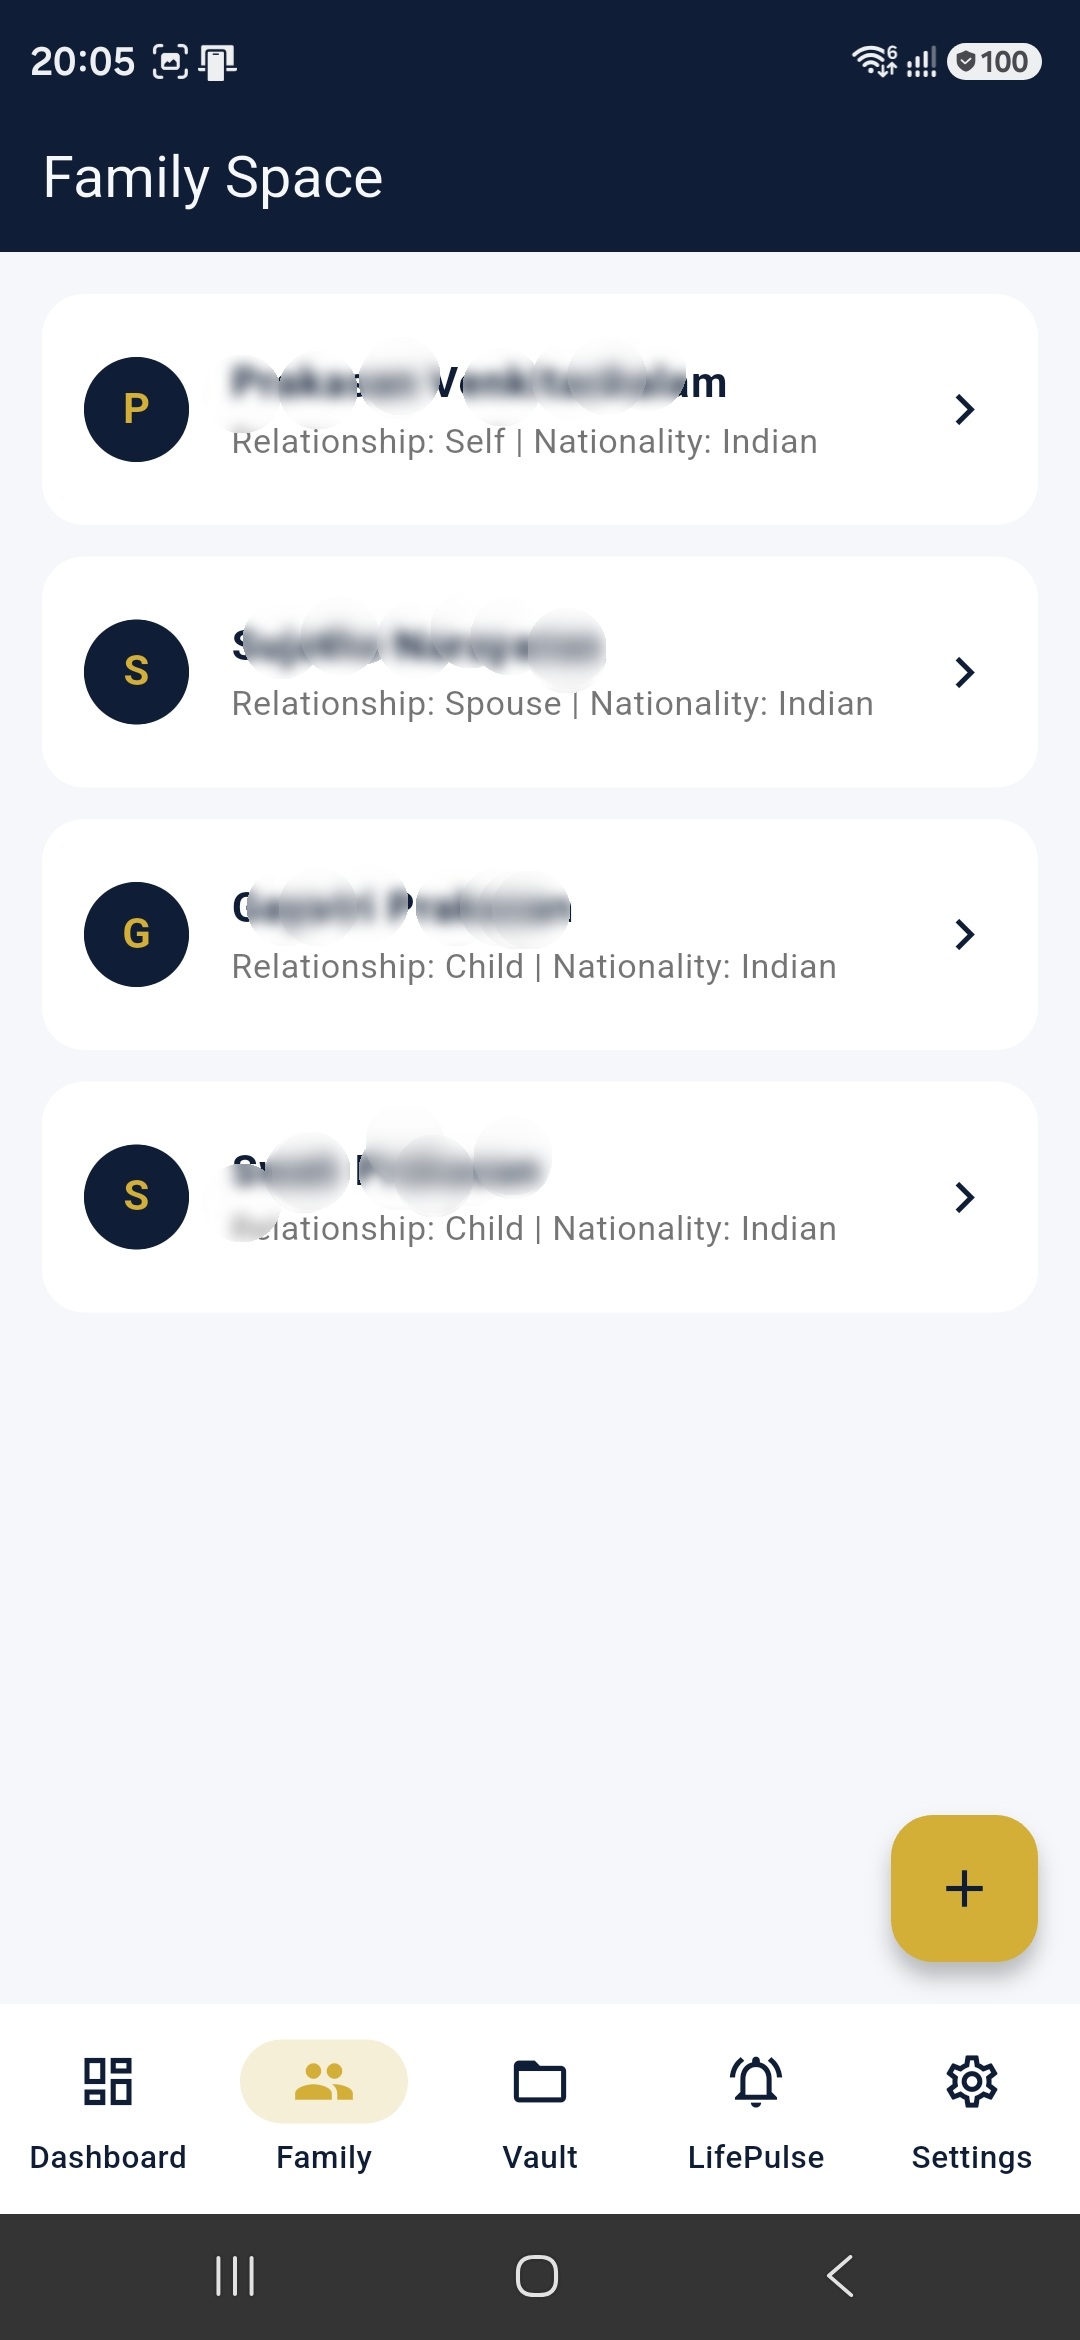
Tapping the "Family" navigation tab displays your cataloged family list. Press the floating action button (+) to add new members.
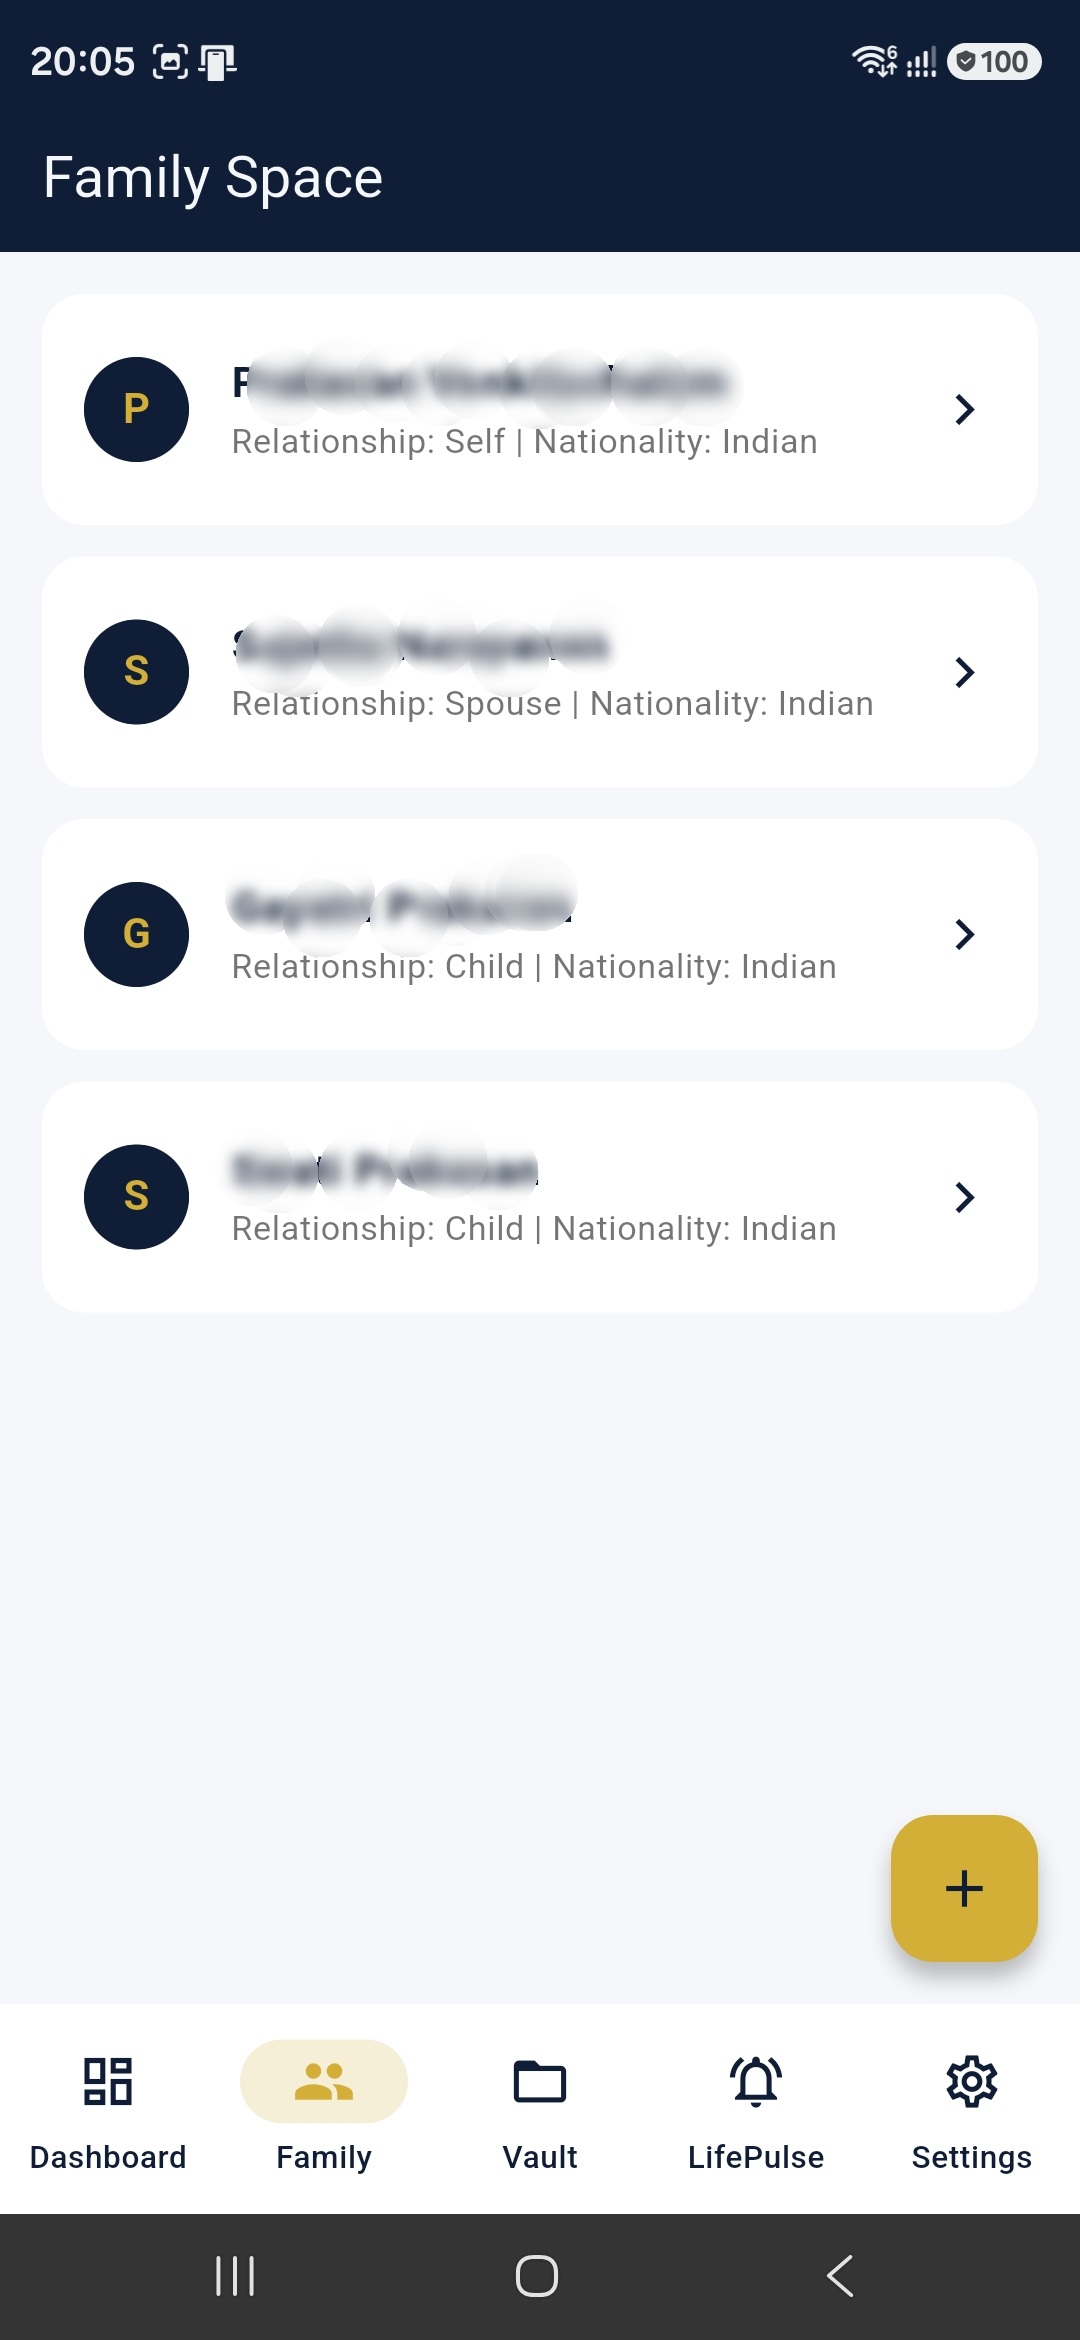
Figure 2: Family profiles list page.
Step 2.2: Add Basic Profile Details & Contact Actions
Fill out the profile's Full Name, Date of Birth, Relationship, Gender, and Contact details. Inside the "Contact Information" section, My LifeVault renders shortcut buttons to Call, send a WhatsApp message, or draft an Email. These buttons automatically enable if a phone number or email address is available.
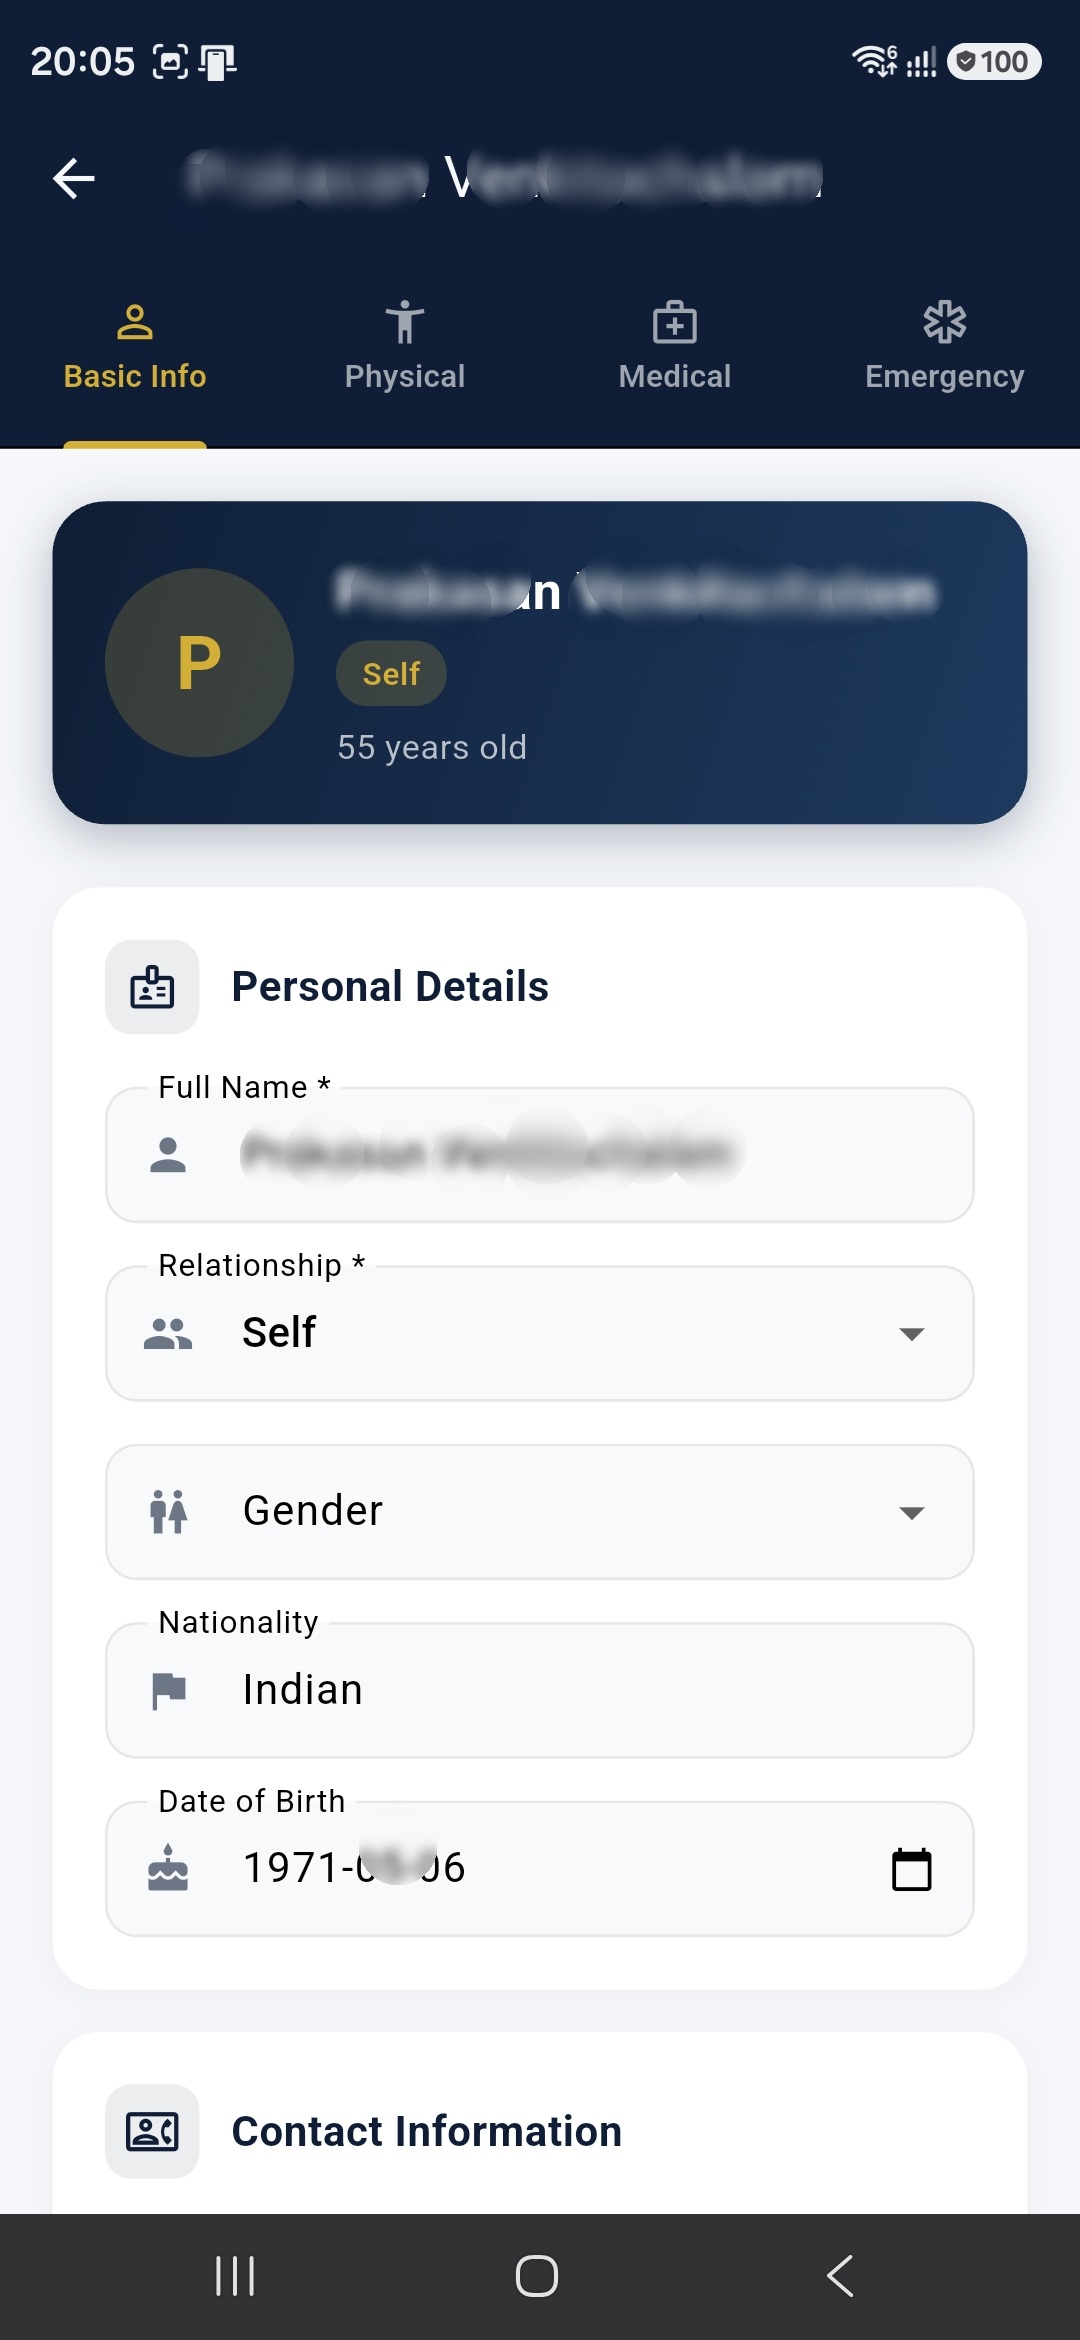
Figure 3: Basic Info tab showing quick communication shortcuts.
Step 2.3: Physical, Medical, & Emergency Details
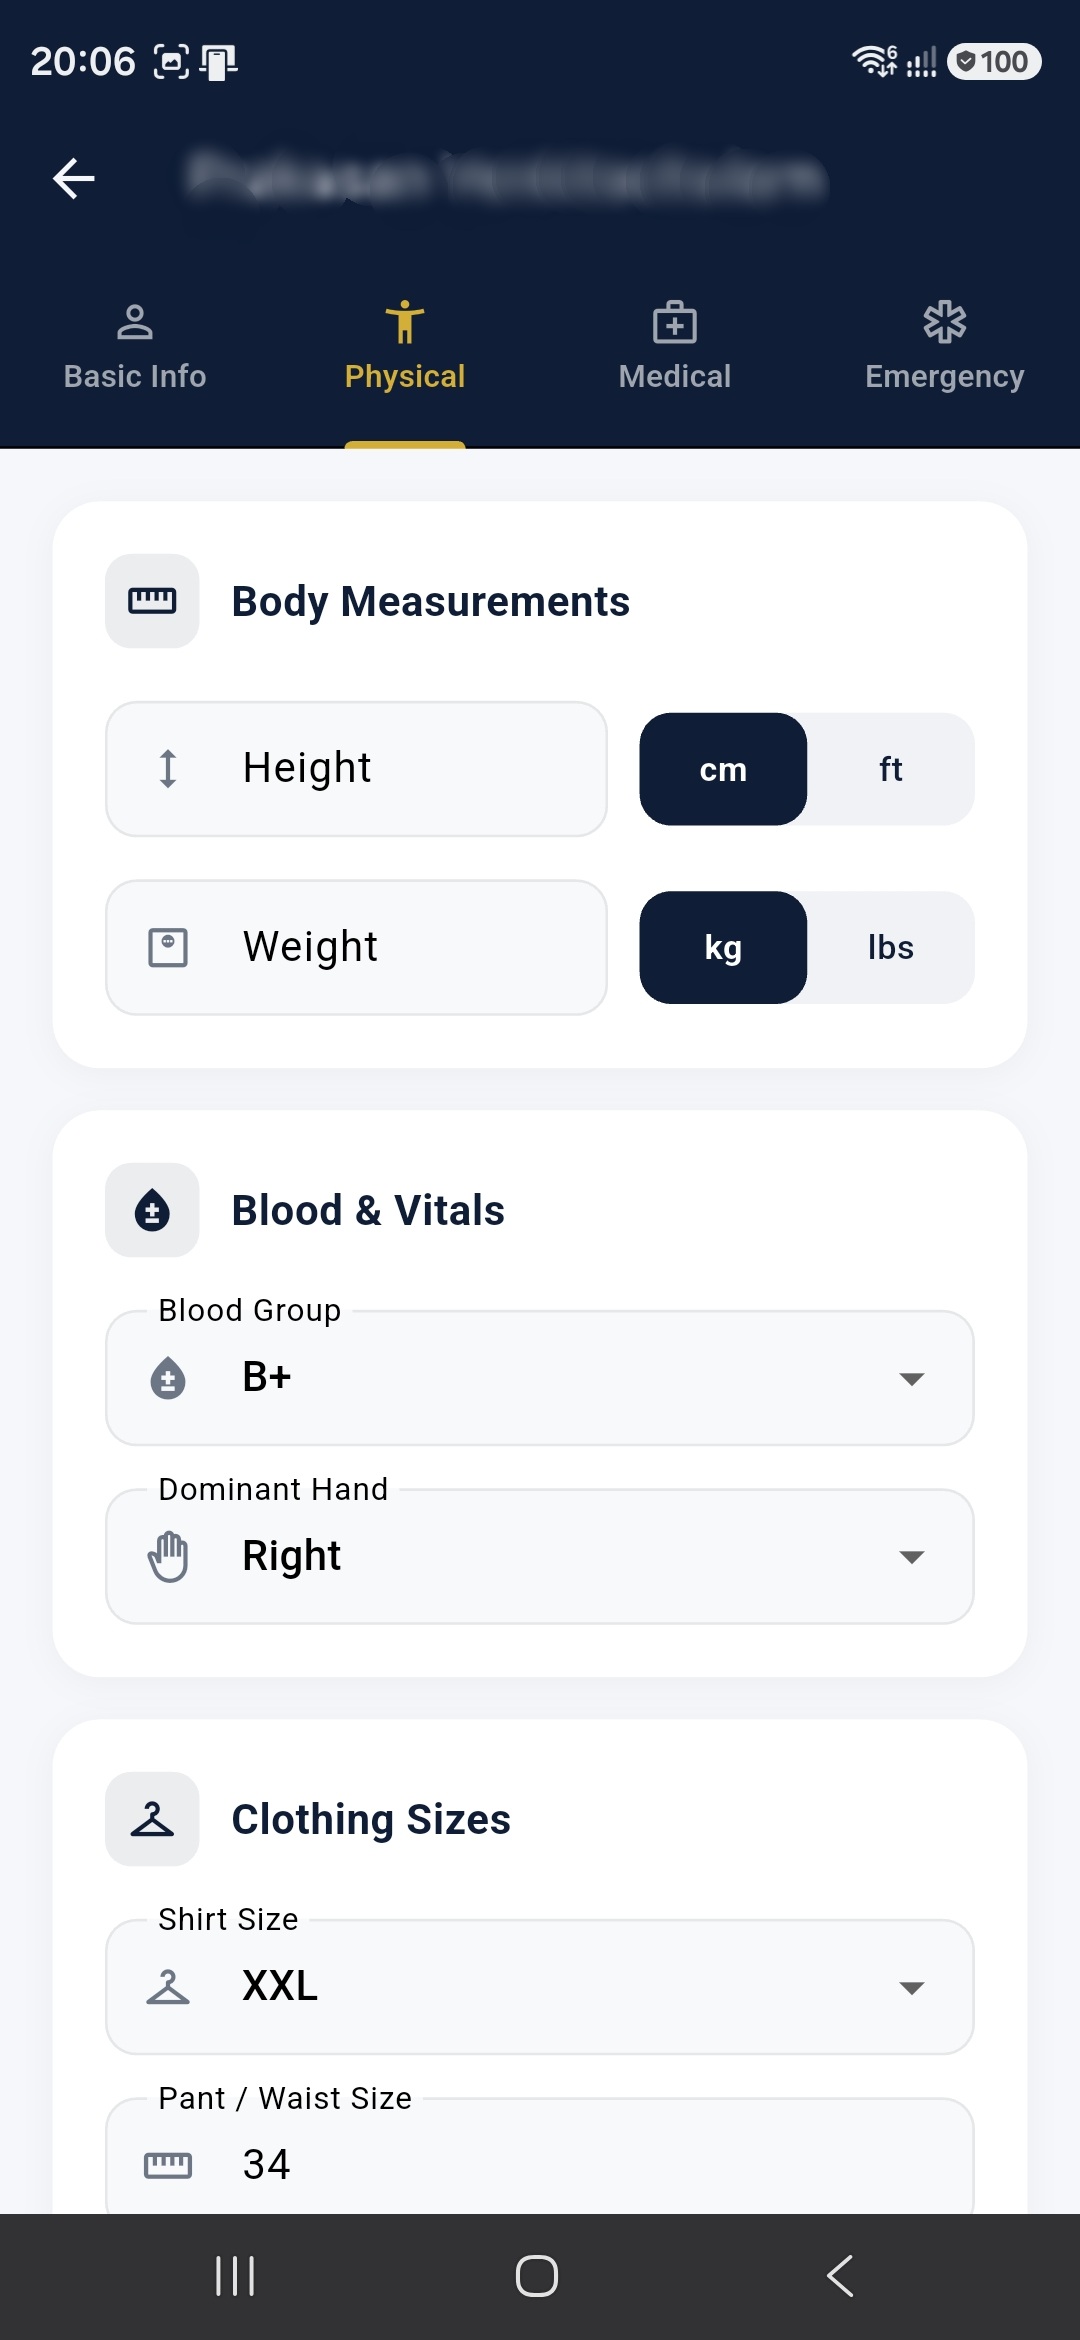
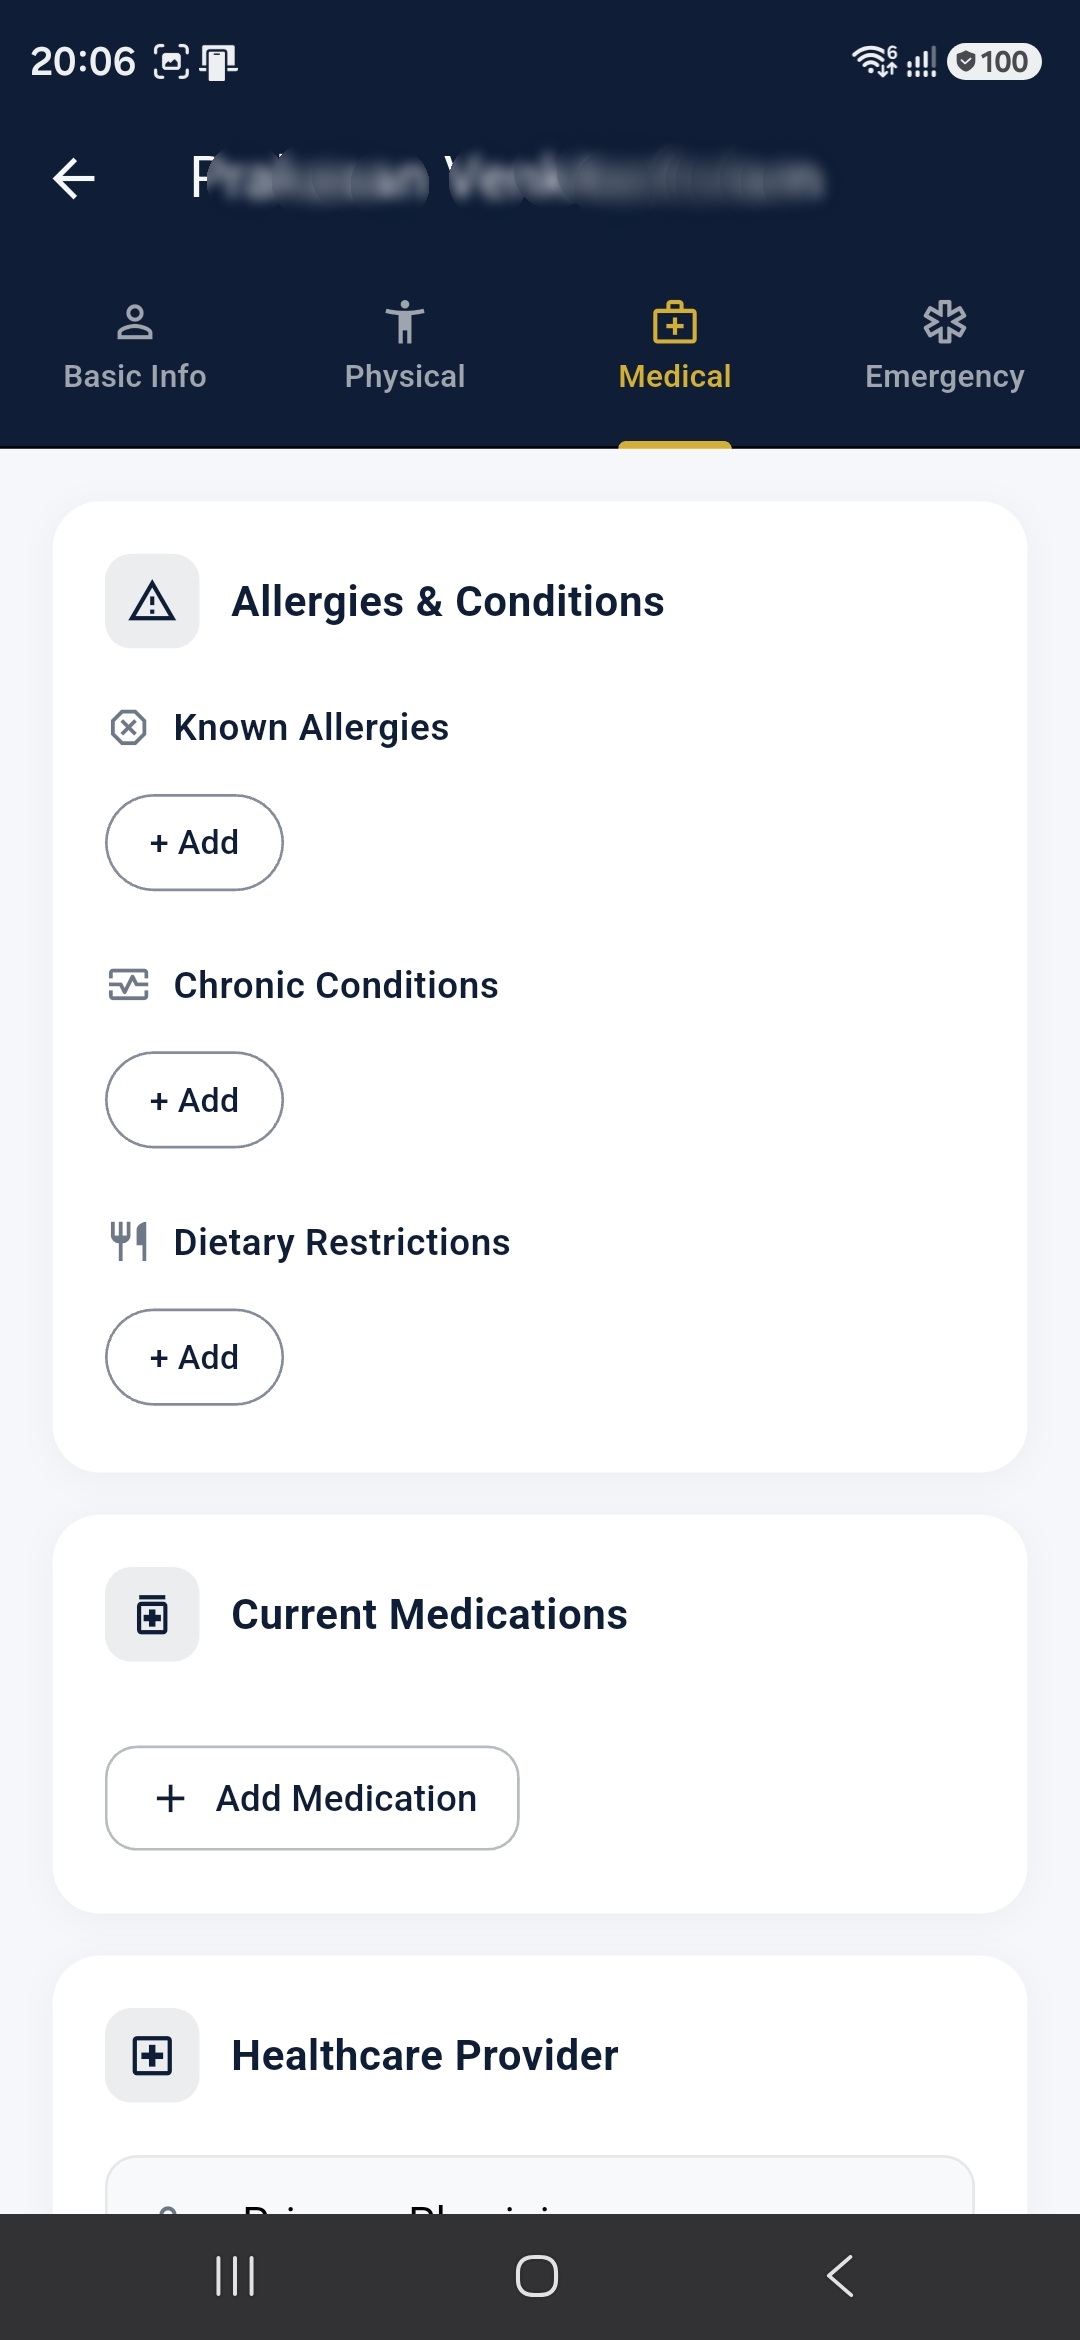
Swipe through tabs to manage clothing sizes (shirt, pant, shoe sizes in US/UK/EU), blood groups, known allergies, chronic conditions, prescriptions, and emergency contact details.
Step 2.4: Export Health Summary (Medical PDF)
Each family profile has a built-in Export Medical Information button — the share icon () in the top-right corner of the profile detail screen. Tapping it generates a ready-to-share PDF health summary for that member, perfect for handing to a doctor or specialist.
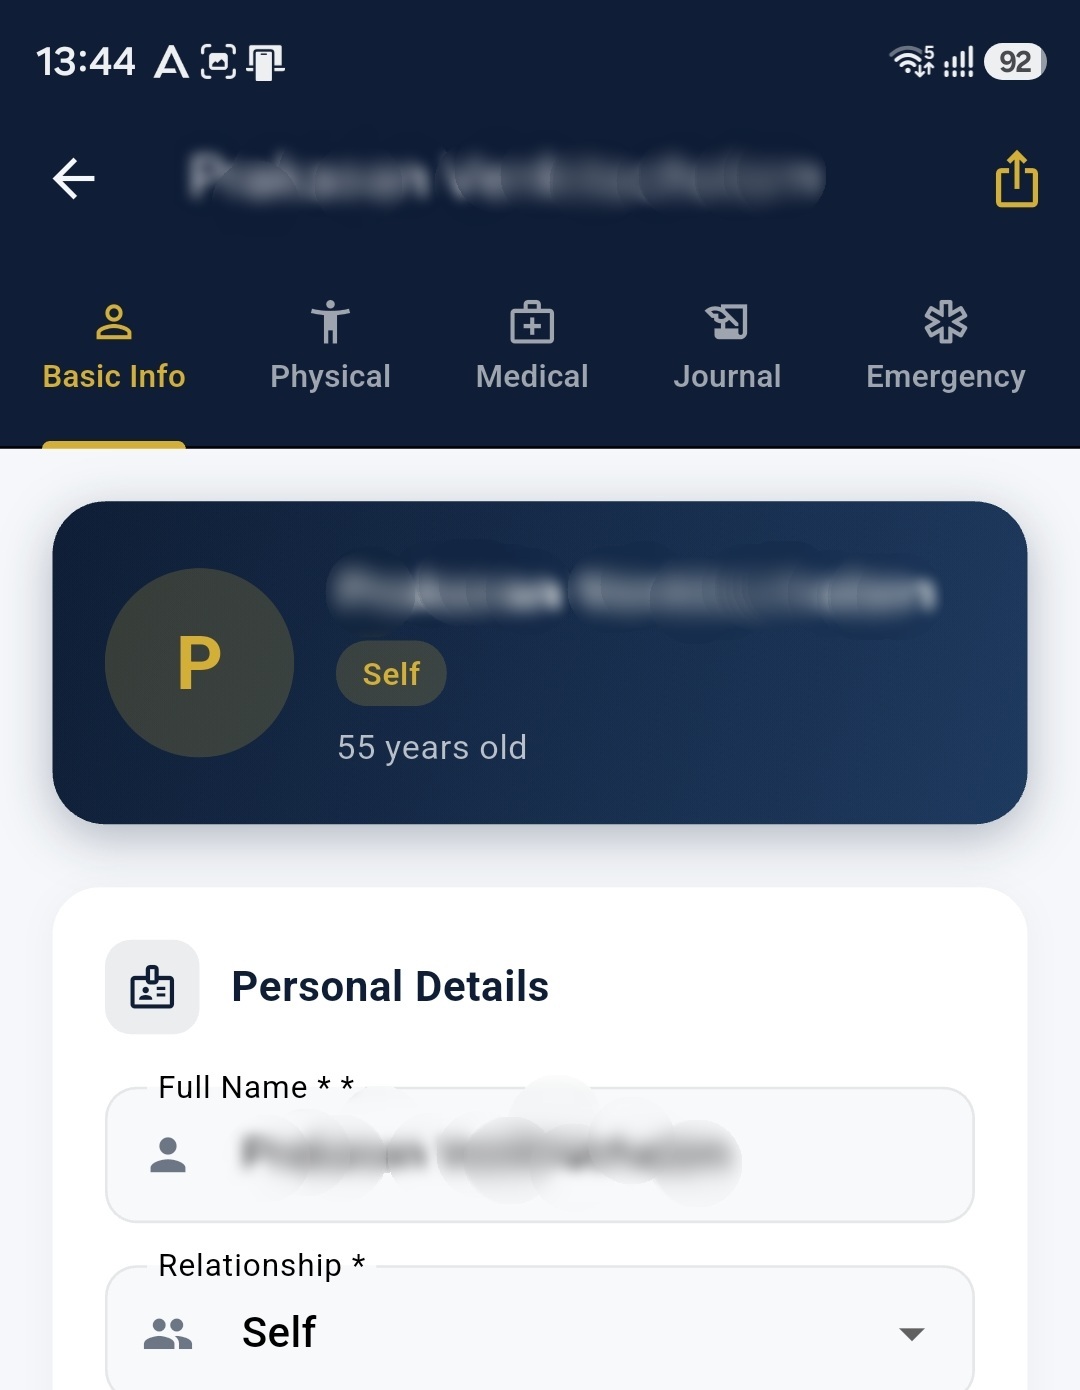
Figure 4a: Share icon in the profile header opens the Export Health Summary sheet.
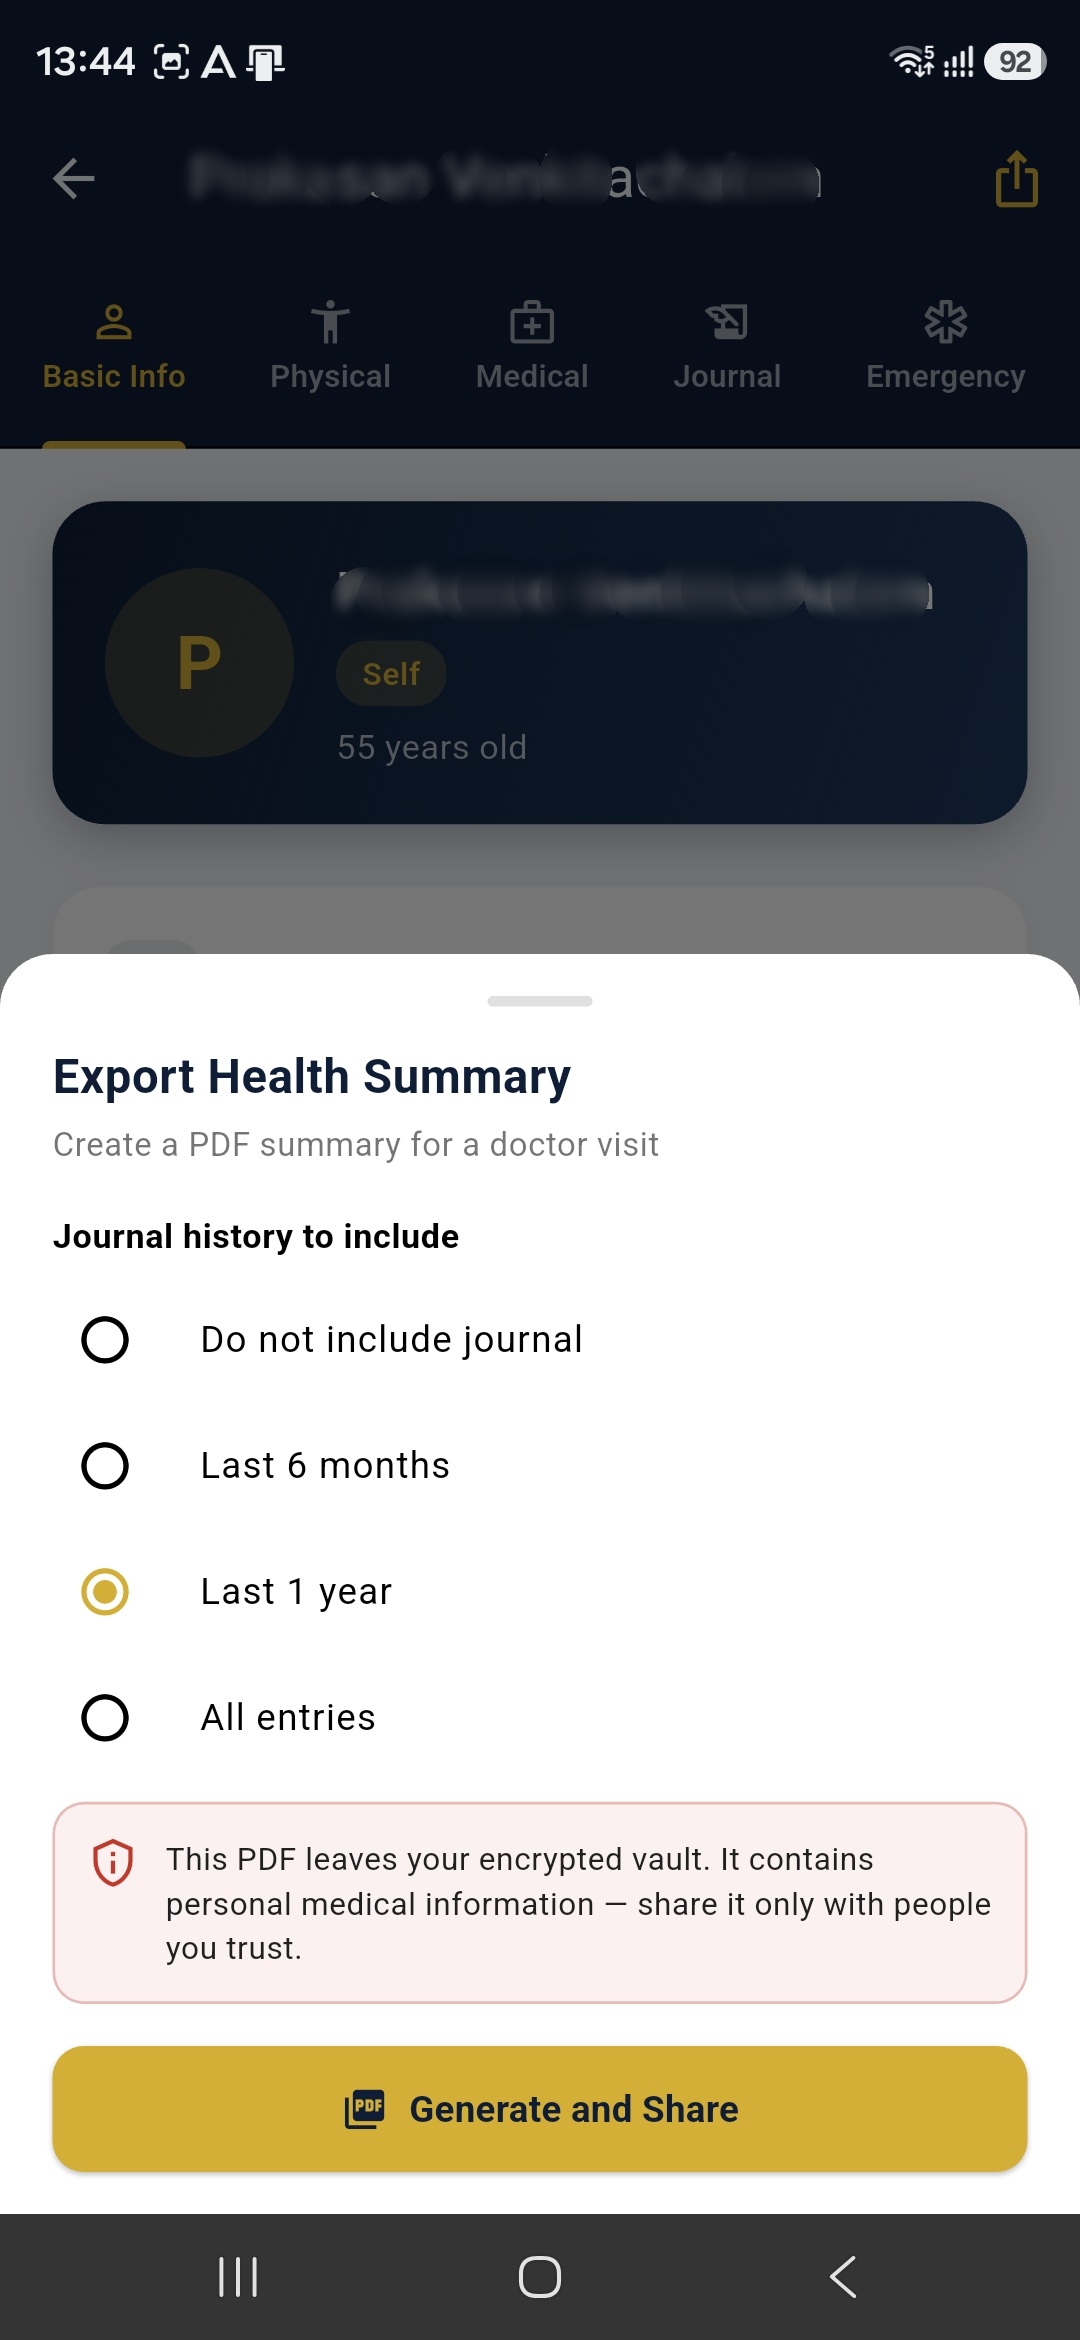
Figure 4b: Export sheet with journal history options and Generate & Share button.
Journal History Options:
- Do not include journal — exports only static medical data (blood group, allergies, conditions, prescriptions, emergency contacts).
- Last 6 months — includes journal entries from the past 6 months.
- Last 1 year — includes journal entries from the past year (default selection).
- All entries — includes the complete journal history.
Tap Generate and Share to create the PDF. My LifeVault opens the system share sheet so you can send it via email, WhatsApp, or save it to your preferred location.
Privacy Notice: This PDF is not encrypted and leaves the secure vault. It contains personal medical information — share it only with trusted individuals such as healthcare providers.
Document Cataloging & Management
Step 3.1: Browse the My LifeVault Catalog
The My LifeVault tab lists all saved documents. Filter categories (passports, driver's licenses, health certs, education) or search by keywords using the filter chips at the top.
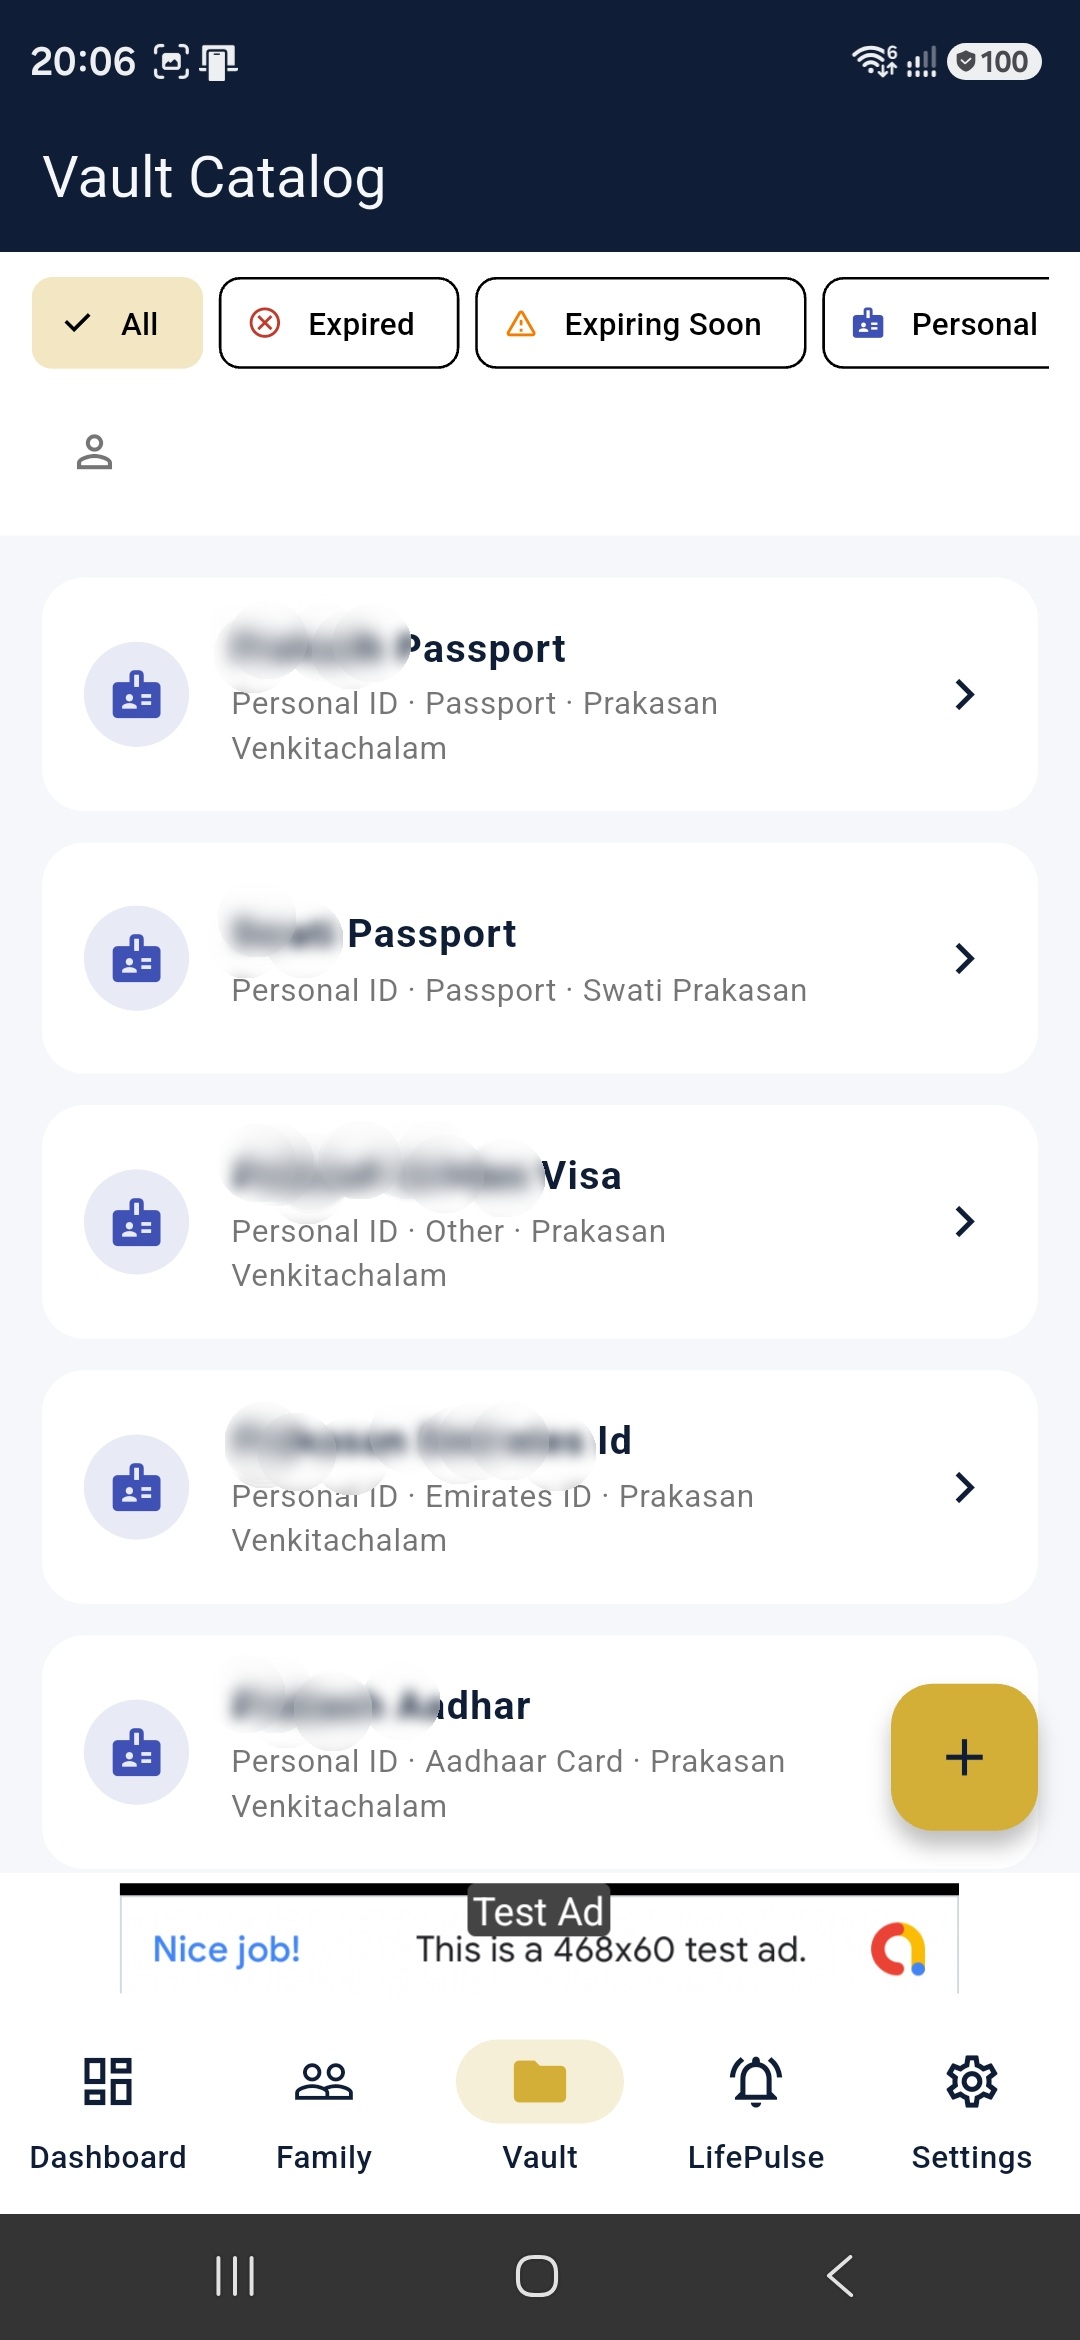
Figure 4: My LifeVault tab displaying files with expiration status indicator tags.
Step 3.2: Scan and Import Documents
Press the add button (+) in the My LifeVault tab. You can use the native Document Scanner (which crops borders automatically and extracts text using OCR), import existing photos from the gallery, or manually key in details.
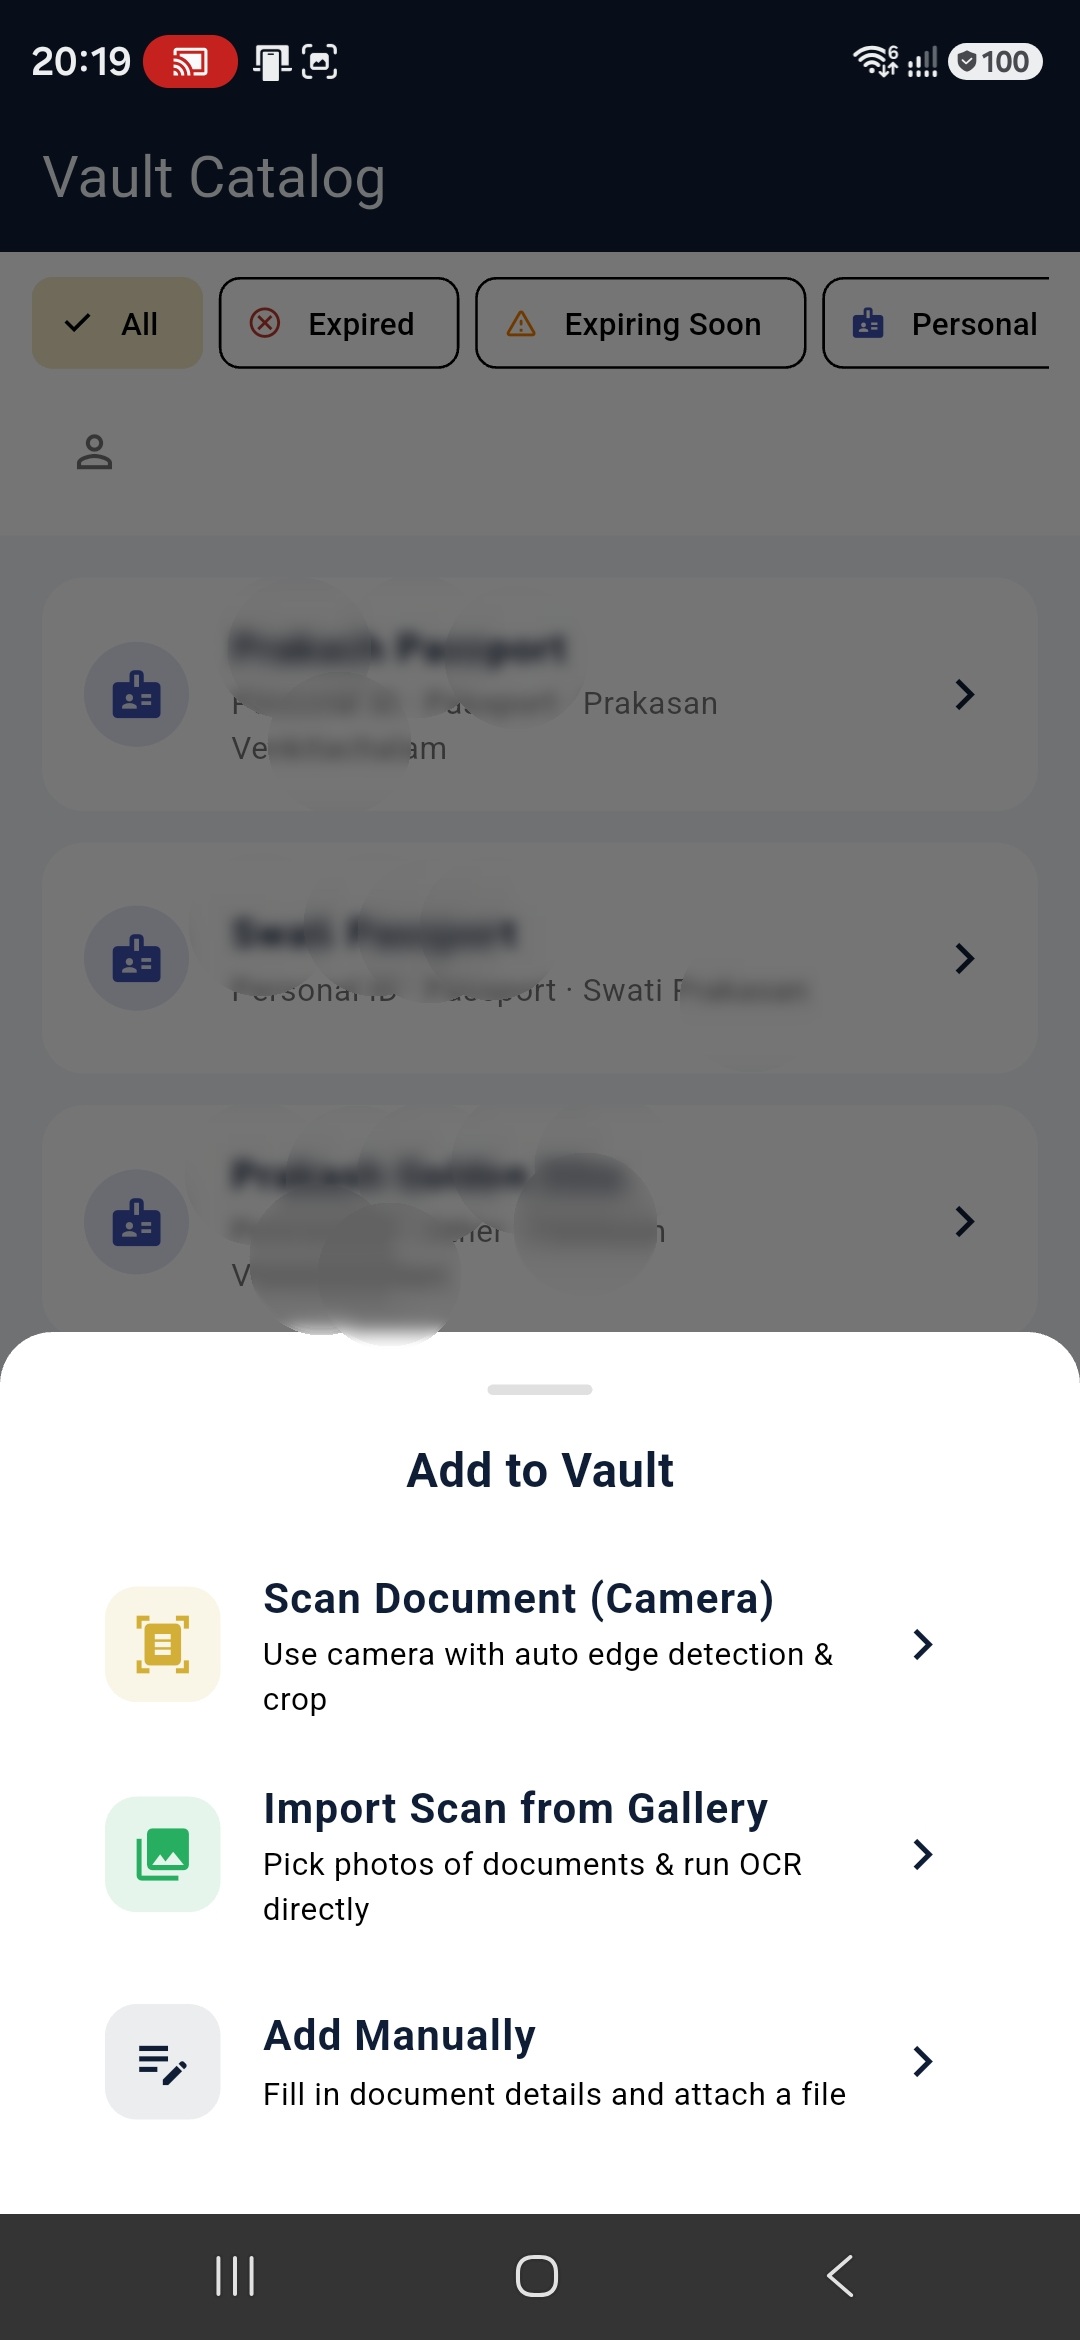
Figure 5: Adding a document details.
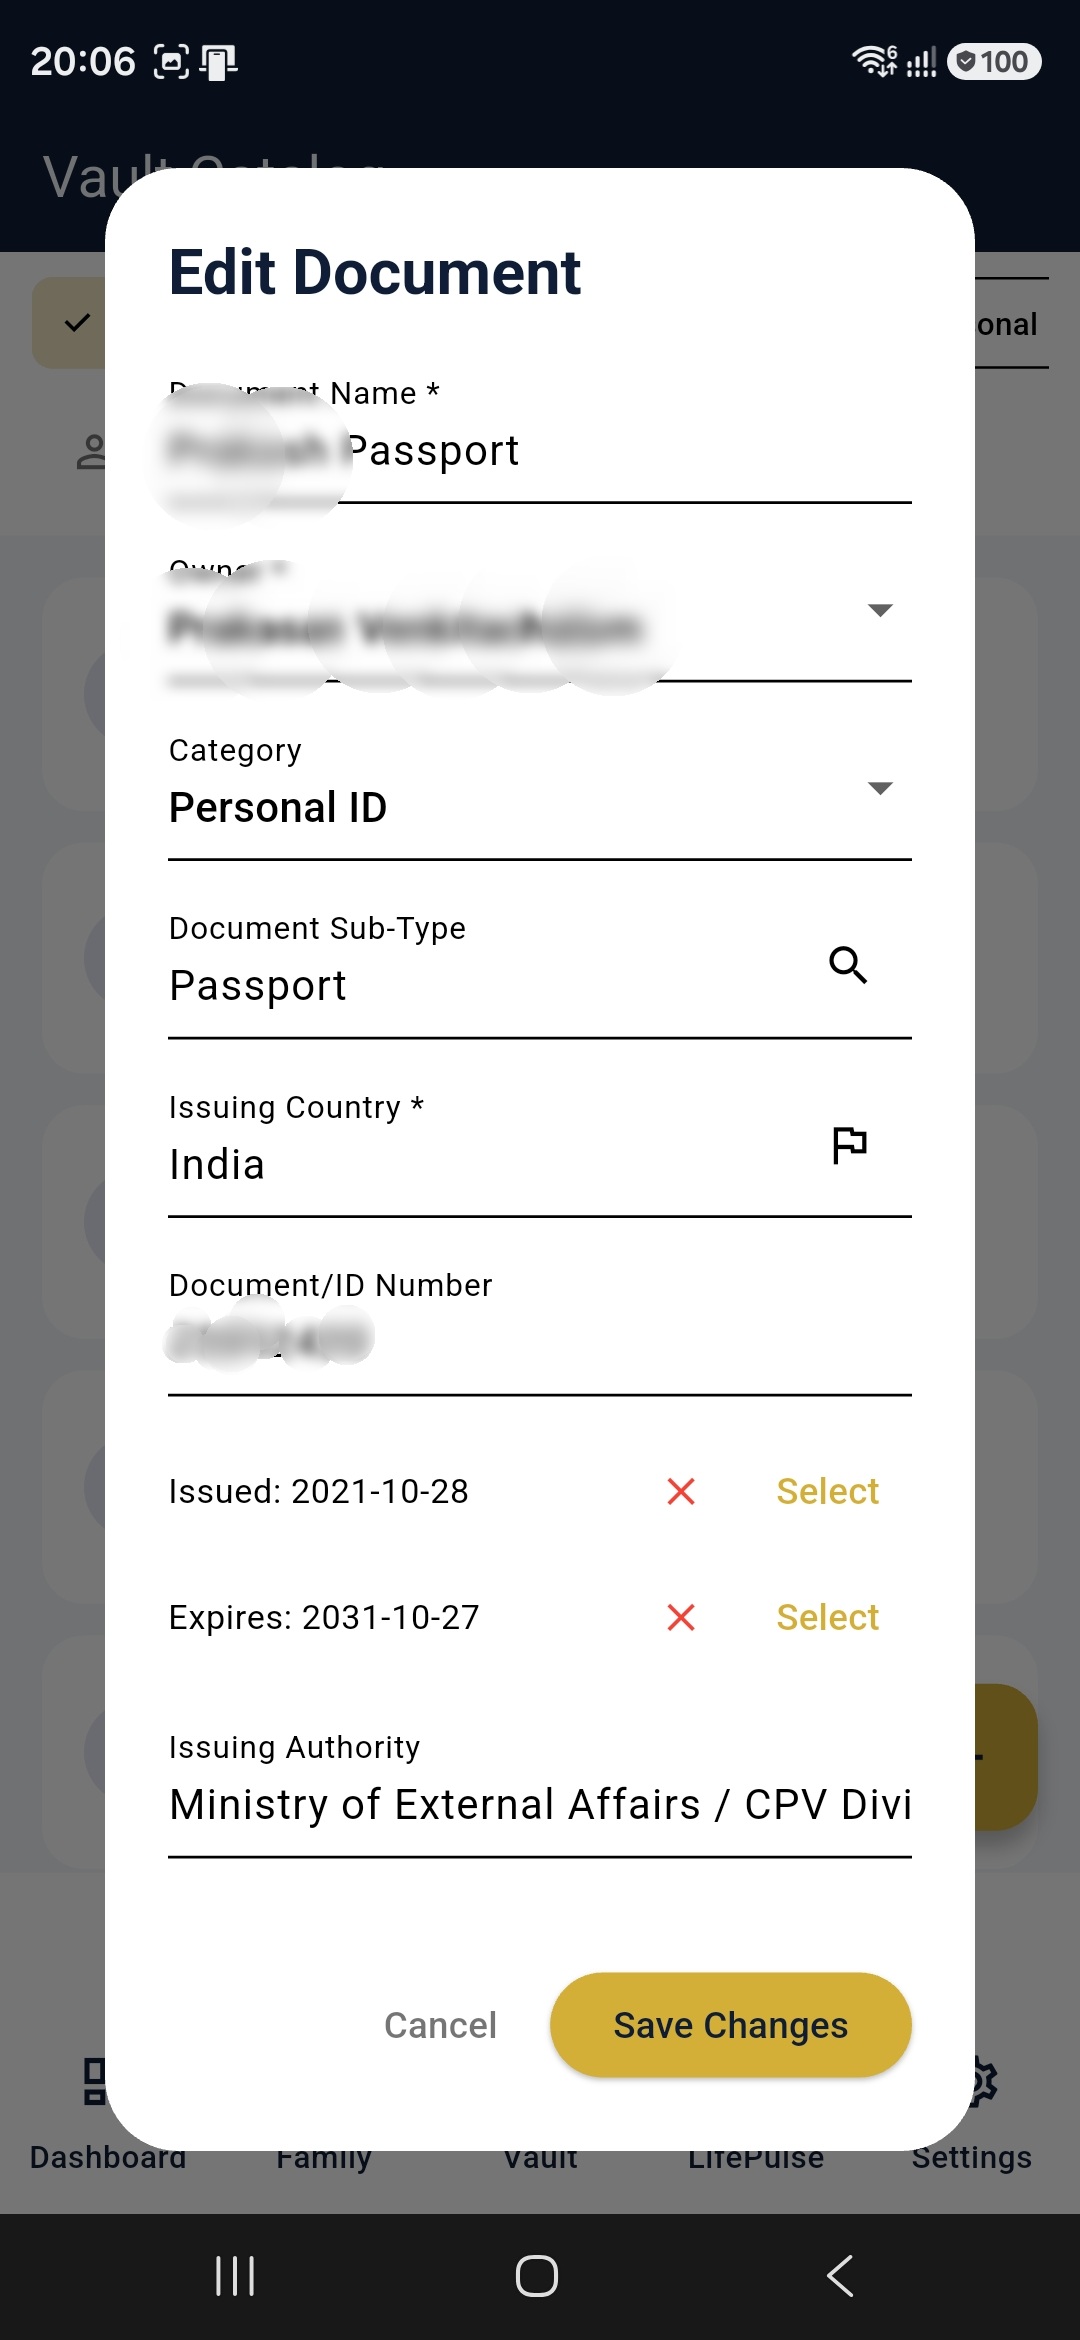
Figure 6: Editing an existing document.
Step 3.3: Preview Document & Expiries
Open a document to view details (number, authority, issue/expiry dates). You can tap 'View PDF' to read/export the file. Red color tags warn you of expired items.
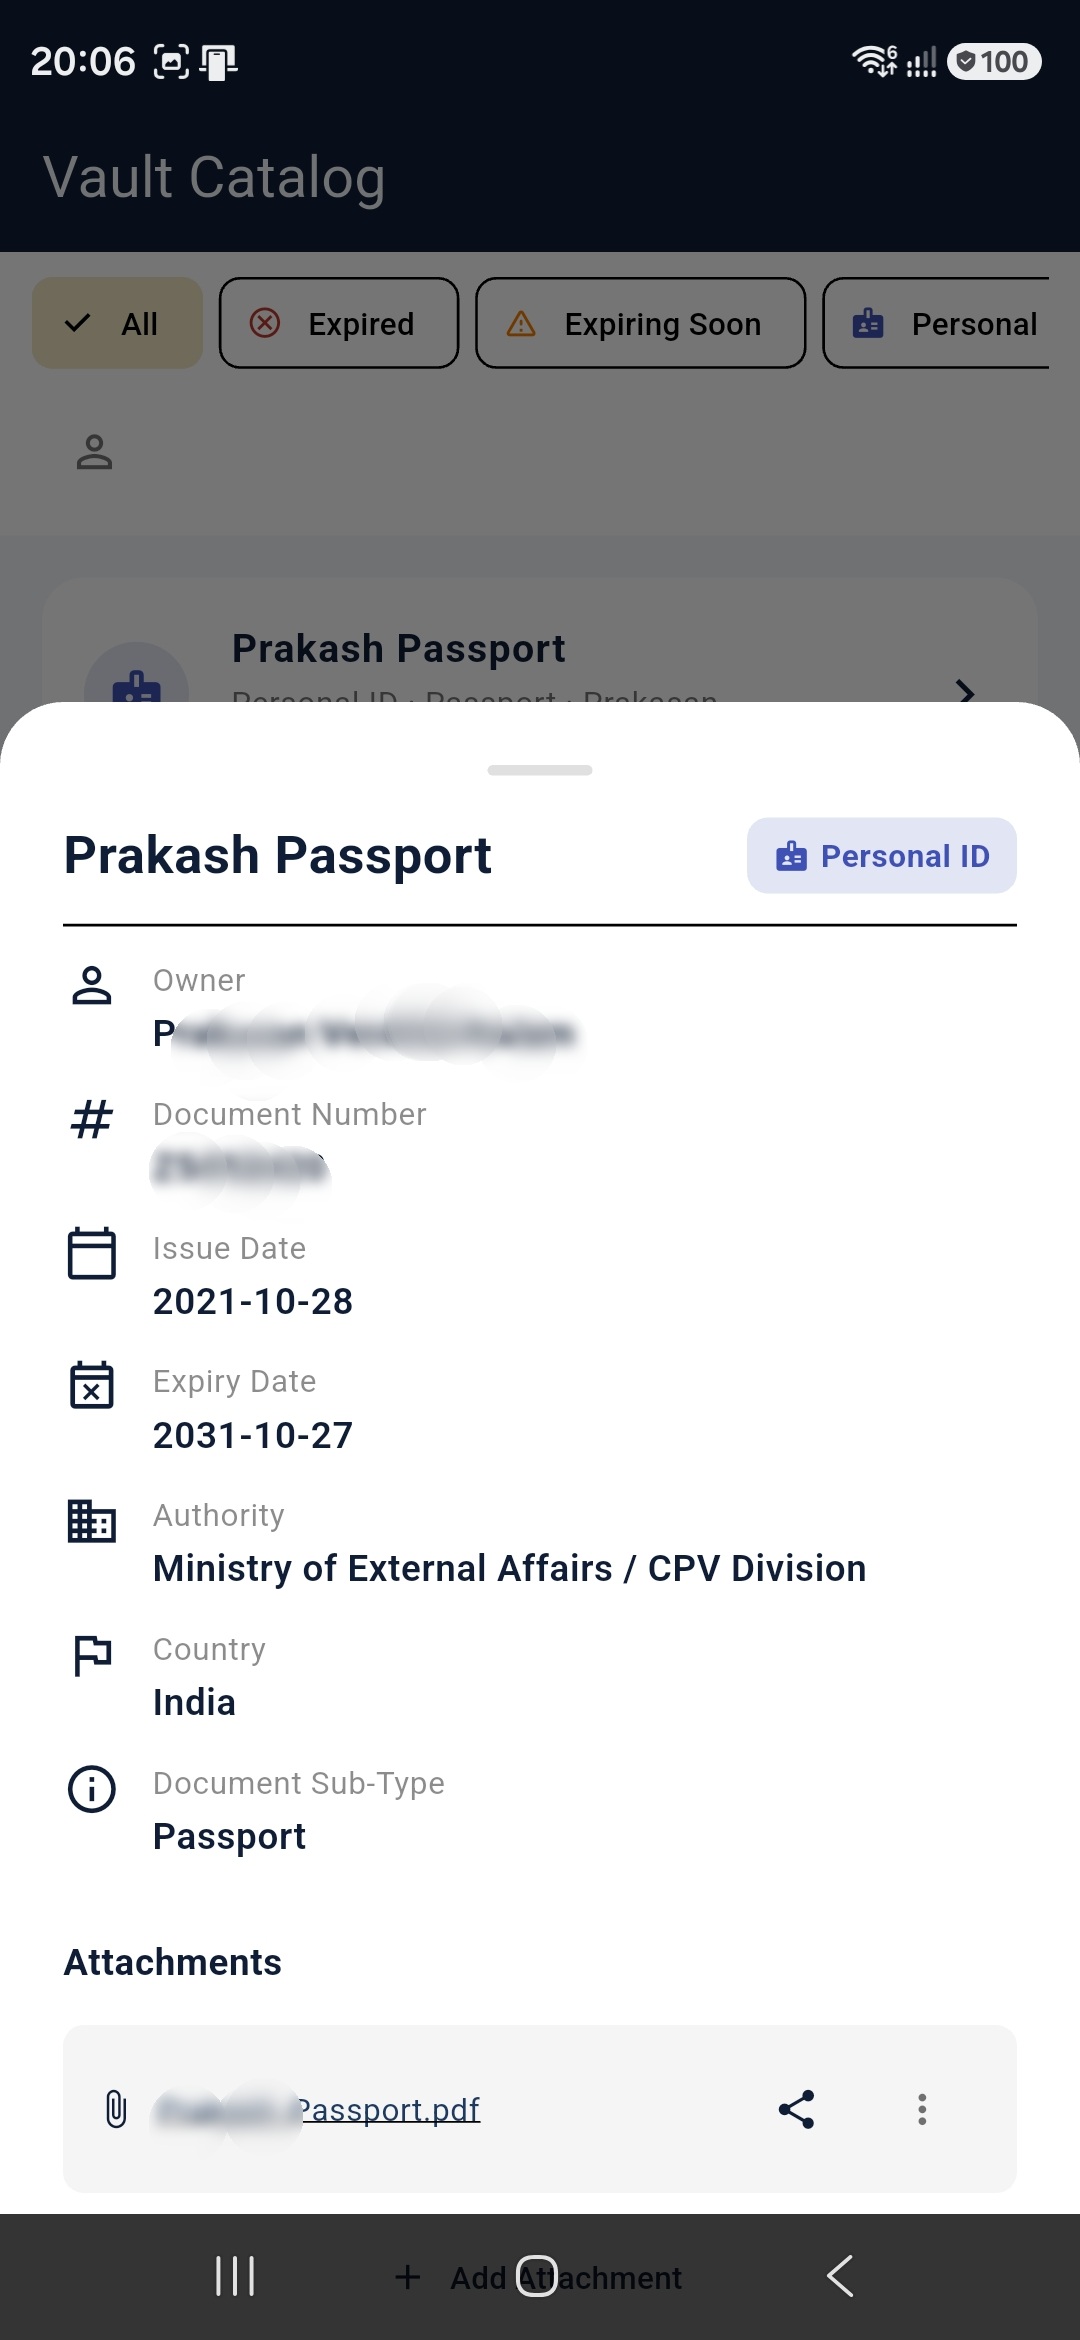
Figure 7: Detailed preview of a cataloged document.
LifePulse Events & Smart Reminders
LifePulse tracks life milestones, payment timelines, custom dates, and birthdays, sending local notification alerts before the event happens.
Step 5.1: Manage Reminders
Tapping the notifications tab displays the LifePulse timeline. You can filter events by category (Anniversary, Renewal, Payment, Custom).
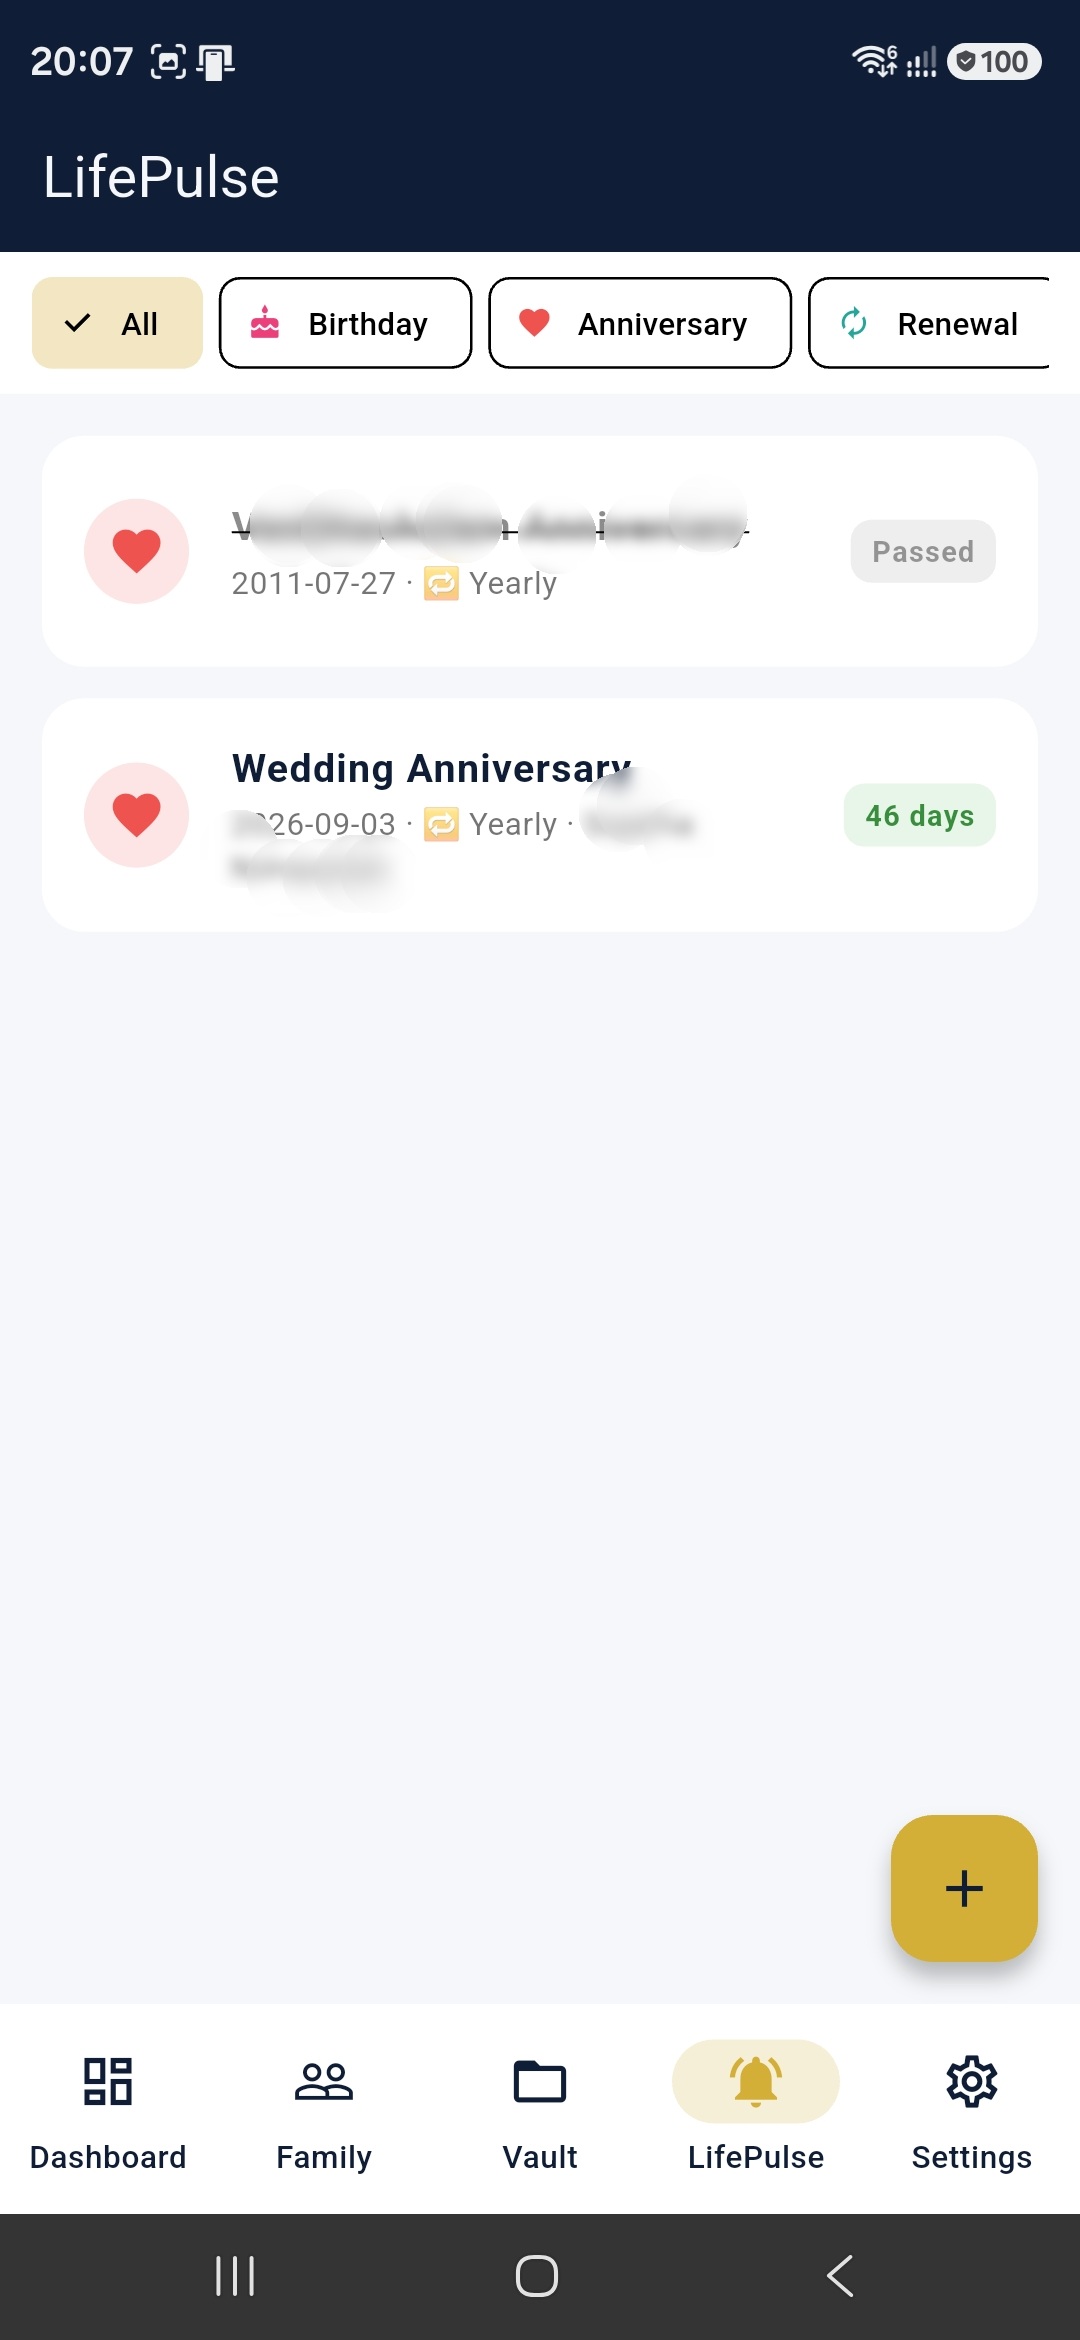
Figure 8: LifePulse timeline screen.
Step 5.2: Create and Link Profile Events
To schedule an alert, set the date, recurrence, and remind days before. You can link the event to a family member profile. If the profile contains contact details, communication shortcuts are automatically loaded into the preview card for quick access.
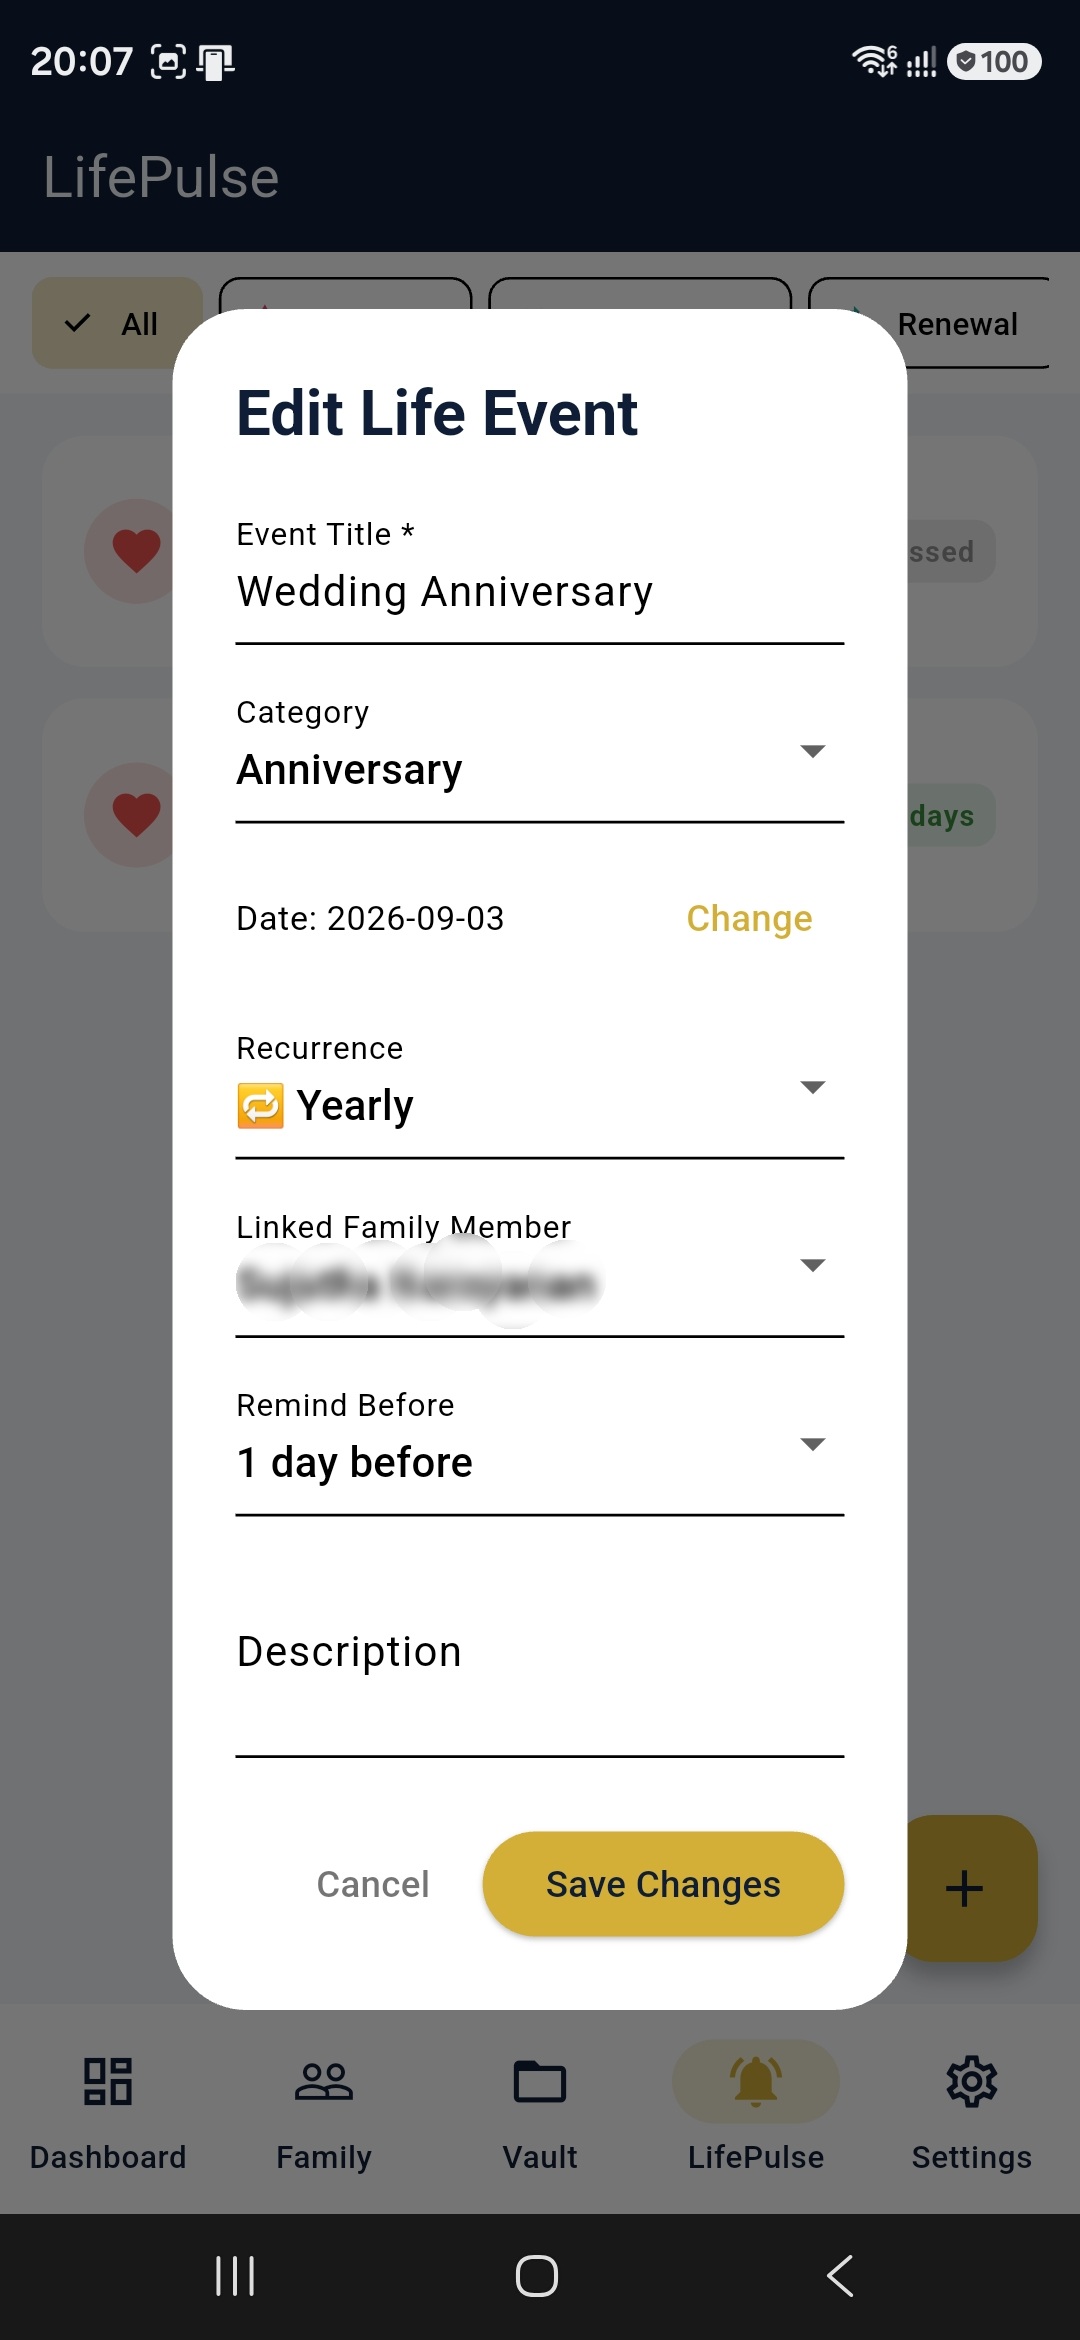
Figure 9: Setting up a custom life event.
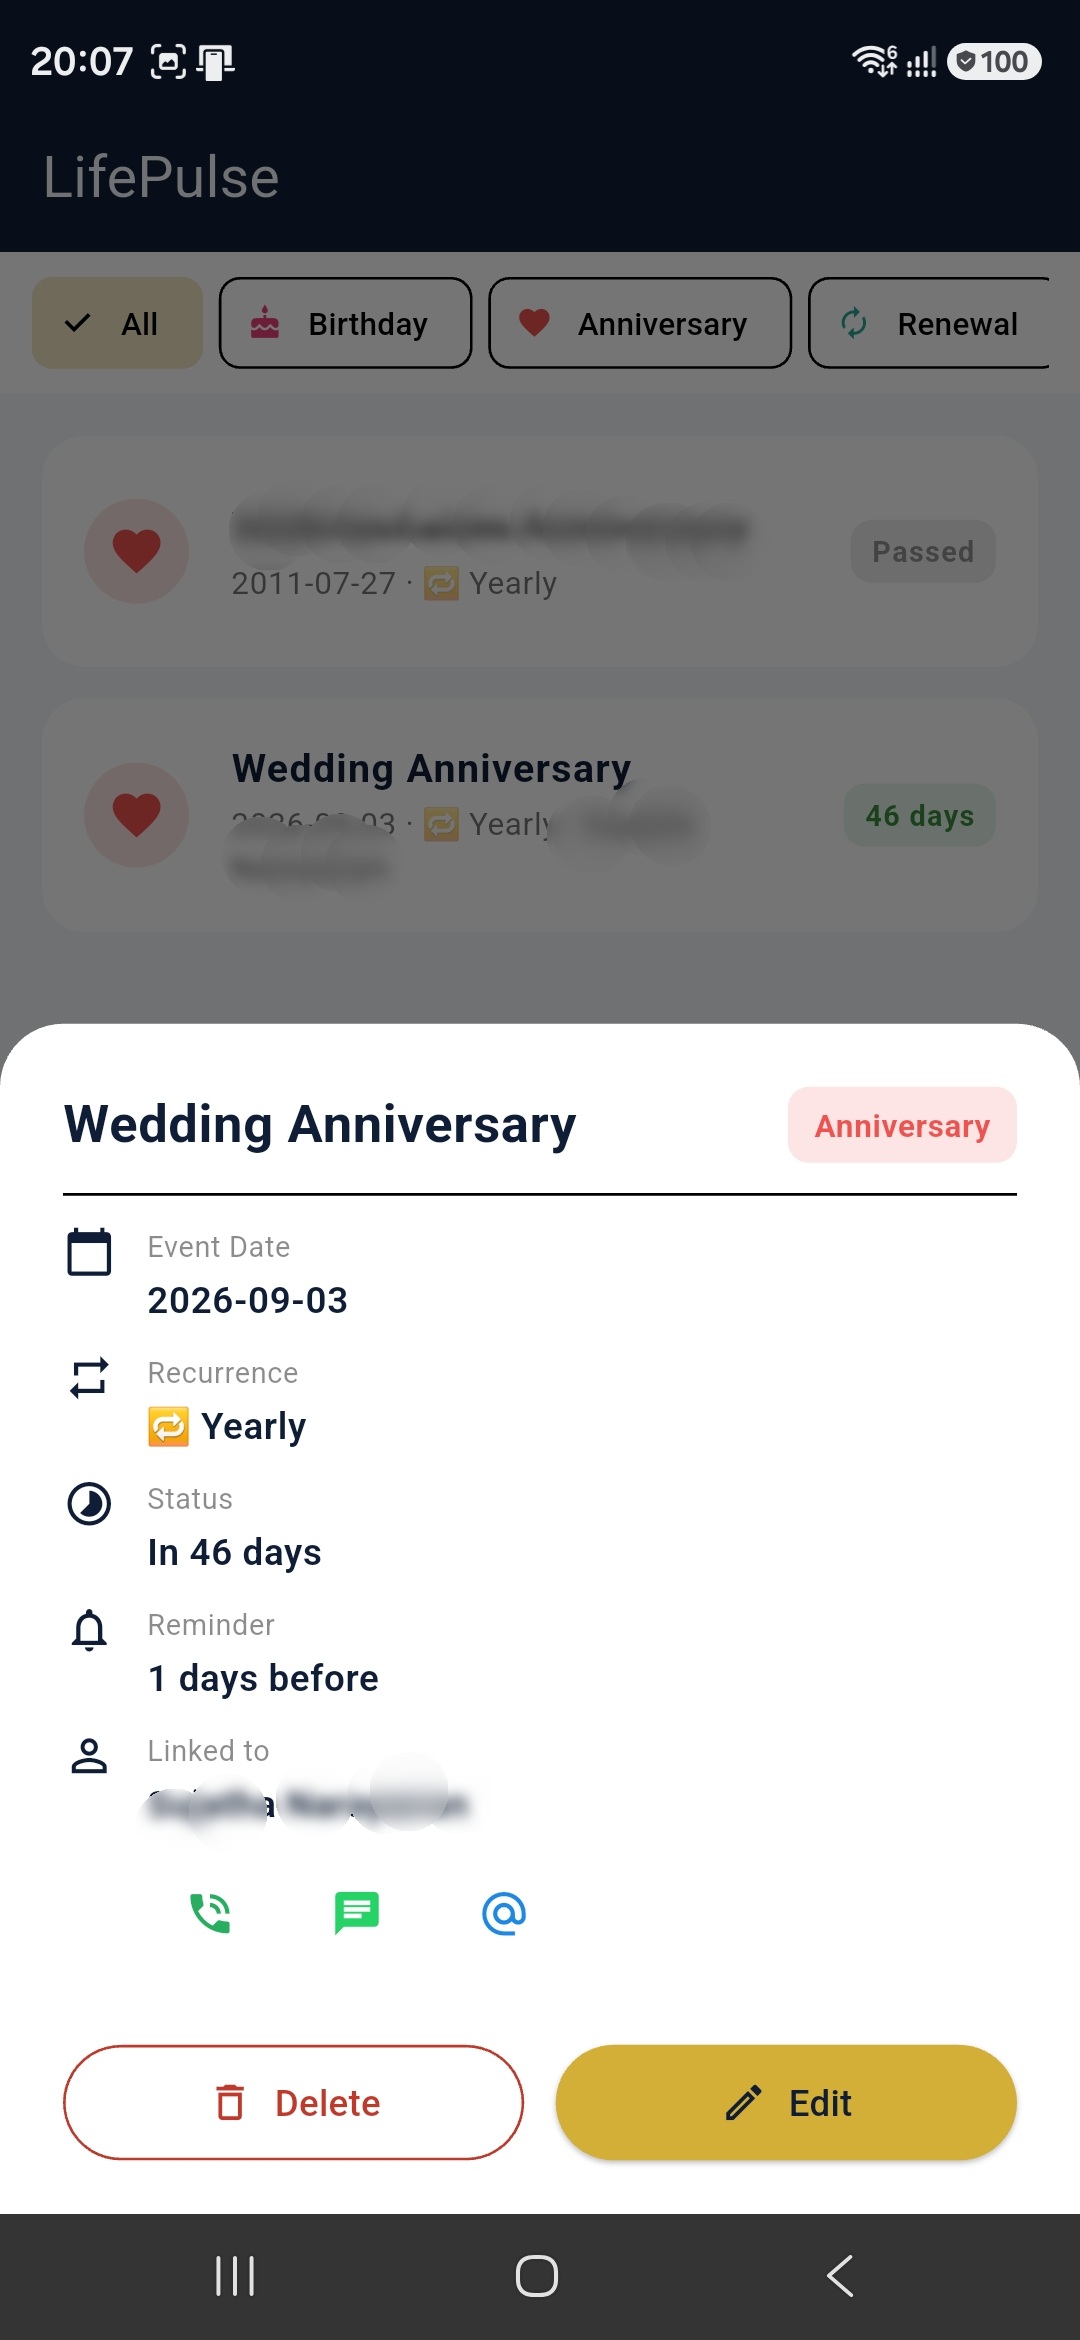
Figure 10: Event details popup with quick-actions.
To-Do & Task Management
The Manage Tasks screen is your personal action tracker inside My LifeVault. Capture things you need to do, assign priorities and due dates, organise tasks into groups, and mark them complete — all stored locally and privately.
Step 6.1: Task Overview & Summary Cards
At the top of the screen, three summary cards give you an instant snapshot of your workload:
- Pending — tasks that are still open and waiting to be done.
- Completed — tasks you have already ticked off.
- High Priority — open tasks flagged as urgent so nothing critical slips through.
Tap any card to instantly filter the list to that category.
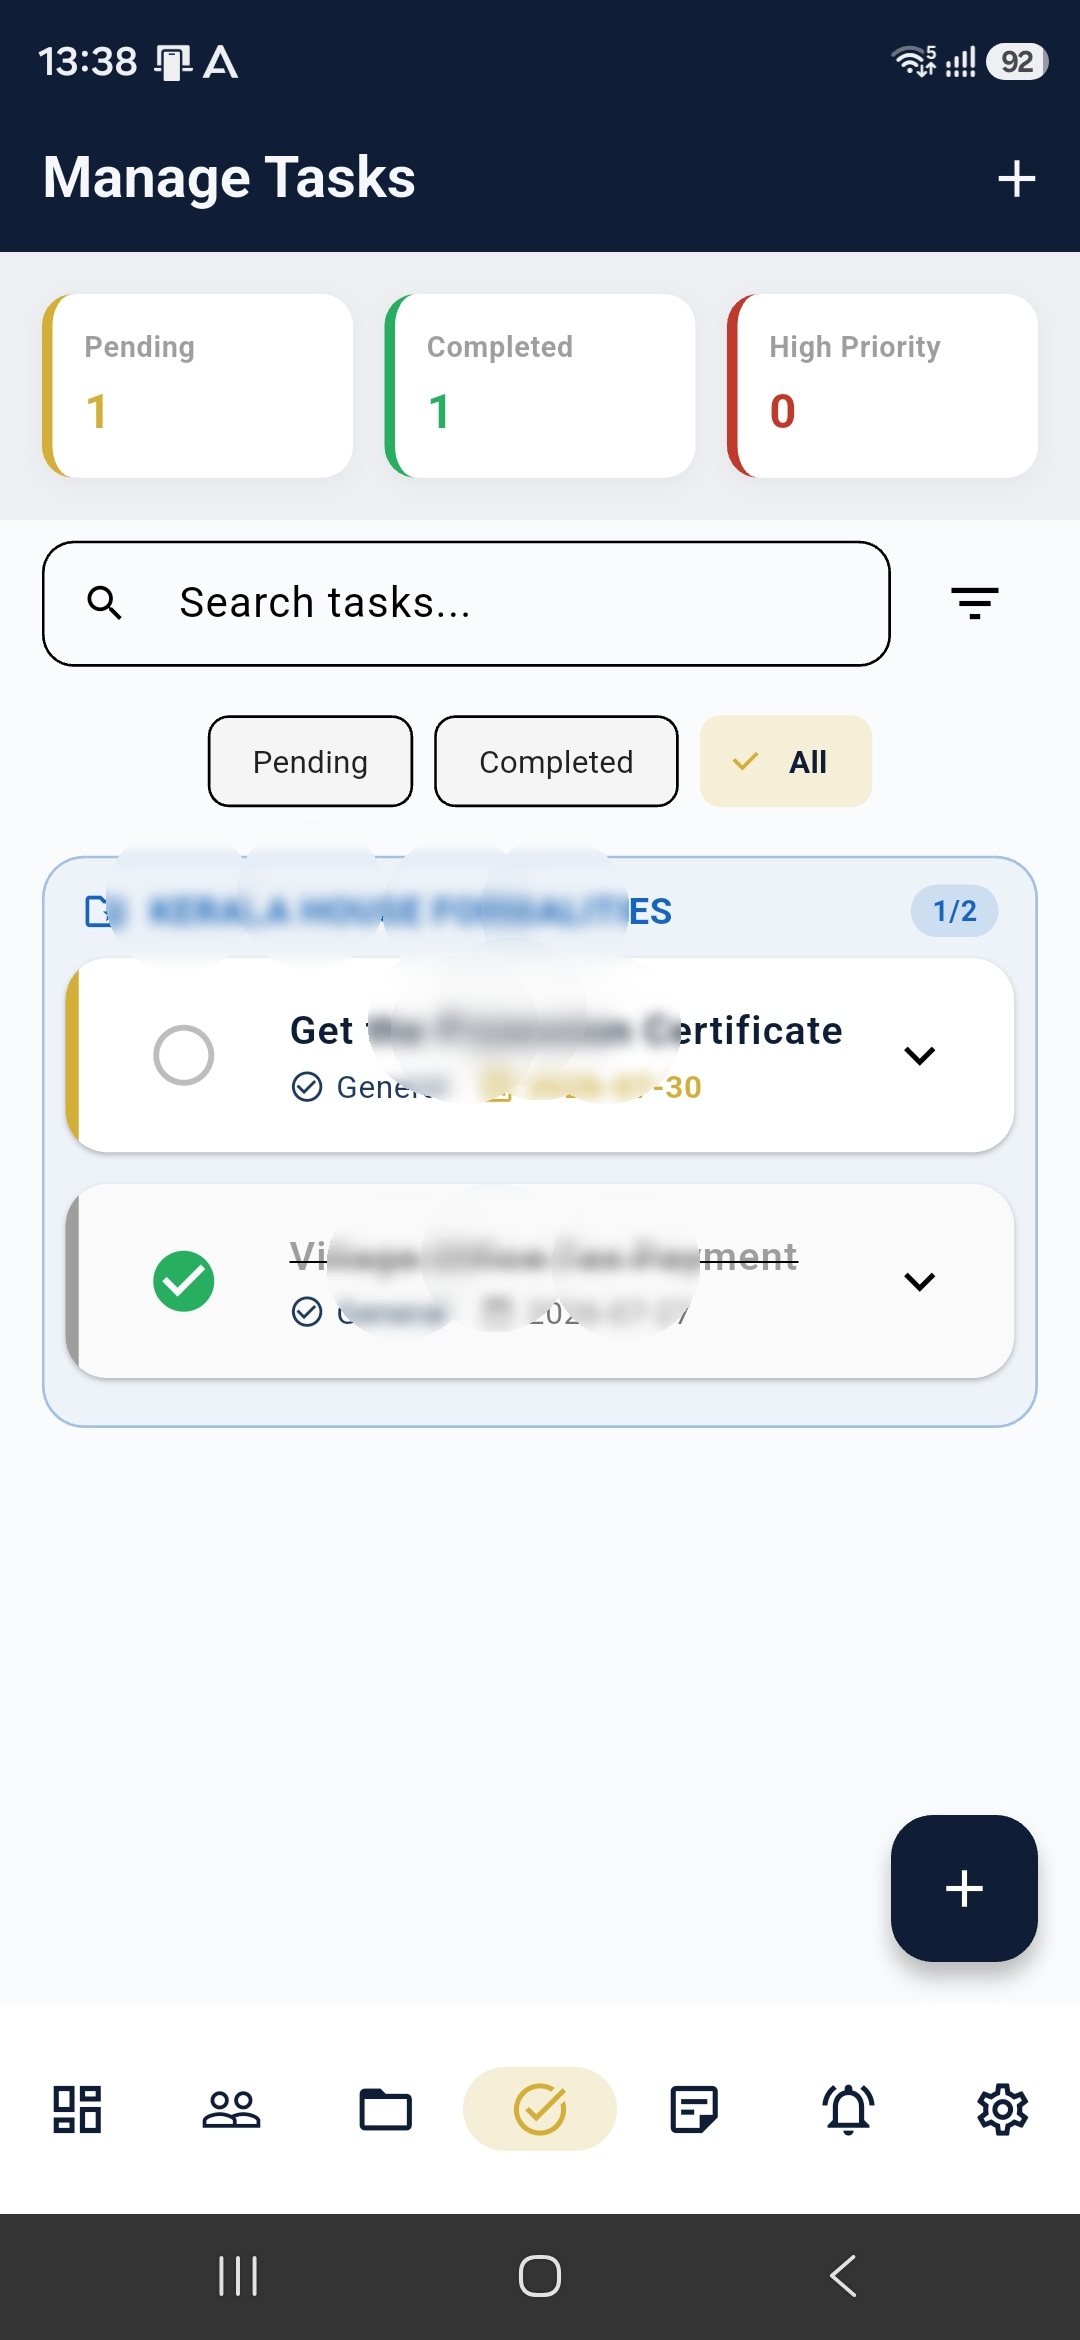
Figure 12: Manage Tasks screen showing summary cards, task groups, and completion status.
Step 6.2: Filtering & Searching Tasks
Use the Search tasks… bar to find a specific task by keyword. Below the search bar, filter tabs let you quickly switch between Pending, Completed, and All views. An additional filter icon opens advanced options to narrow tasks by Priority (High / Medium / Low), Category (Document Renewal, Finance/Bill, Health/Medical, Family/Home, General), or a linked Family Profile.
Step 6.3: Task Groups
Tasks can be organised into named groups — for example, one group per project or life area. Each group card displays a progress badge (e.g., 1/2) showing how many tasks are complete out of the total. Tap the group header to expand or collapse its items. You can create, rename, and delete groups directly from the task screen.
Step 6.4: Adding & Editing a Task
Press the floating (+) button to create a new task. Fill in:
- Title — a clear action description.
- Category — the type of task (Document Renewal, Finance/Bill, Health/Medical, Family/Home, or General).
- Priority — High, Medium, or Low.
- Due Date — optional target completion date.
- Linked Profile — optionally associate the task with a family member.
- Group — assign the task to an existing group or leave it ungrouped.
Tap the circle checkbox on any task row to toggle it between Pending and Completed. Tap the expand arrow to view full task details inline, or long-press to access edit and delete options.
Notes
The Notes screen is a private, category-tagged notepad built into My LifeVault. Store account numbers, reference codes, personal memos, or any sensitive information you want to keep close at hand — completely offline.
Step 7.1: Browsing & Searching Notes
The Notes list shows all your saved notes as cards with a colour-coded left border that reflects their assigned category colour. Each card previews the note title, a snippet of content, the category tag, any linked family member, and — for multi-section notes — a Sections count badge.
Use the Search notes… bar to find notes by title or content. The filter chips below let you narrow the list to a specific category (e.g., BANKING, Official). Pinned notes always appear at the top of the list with a pin icon.
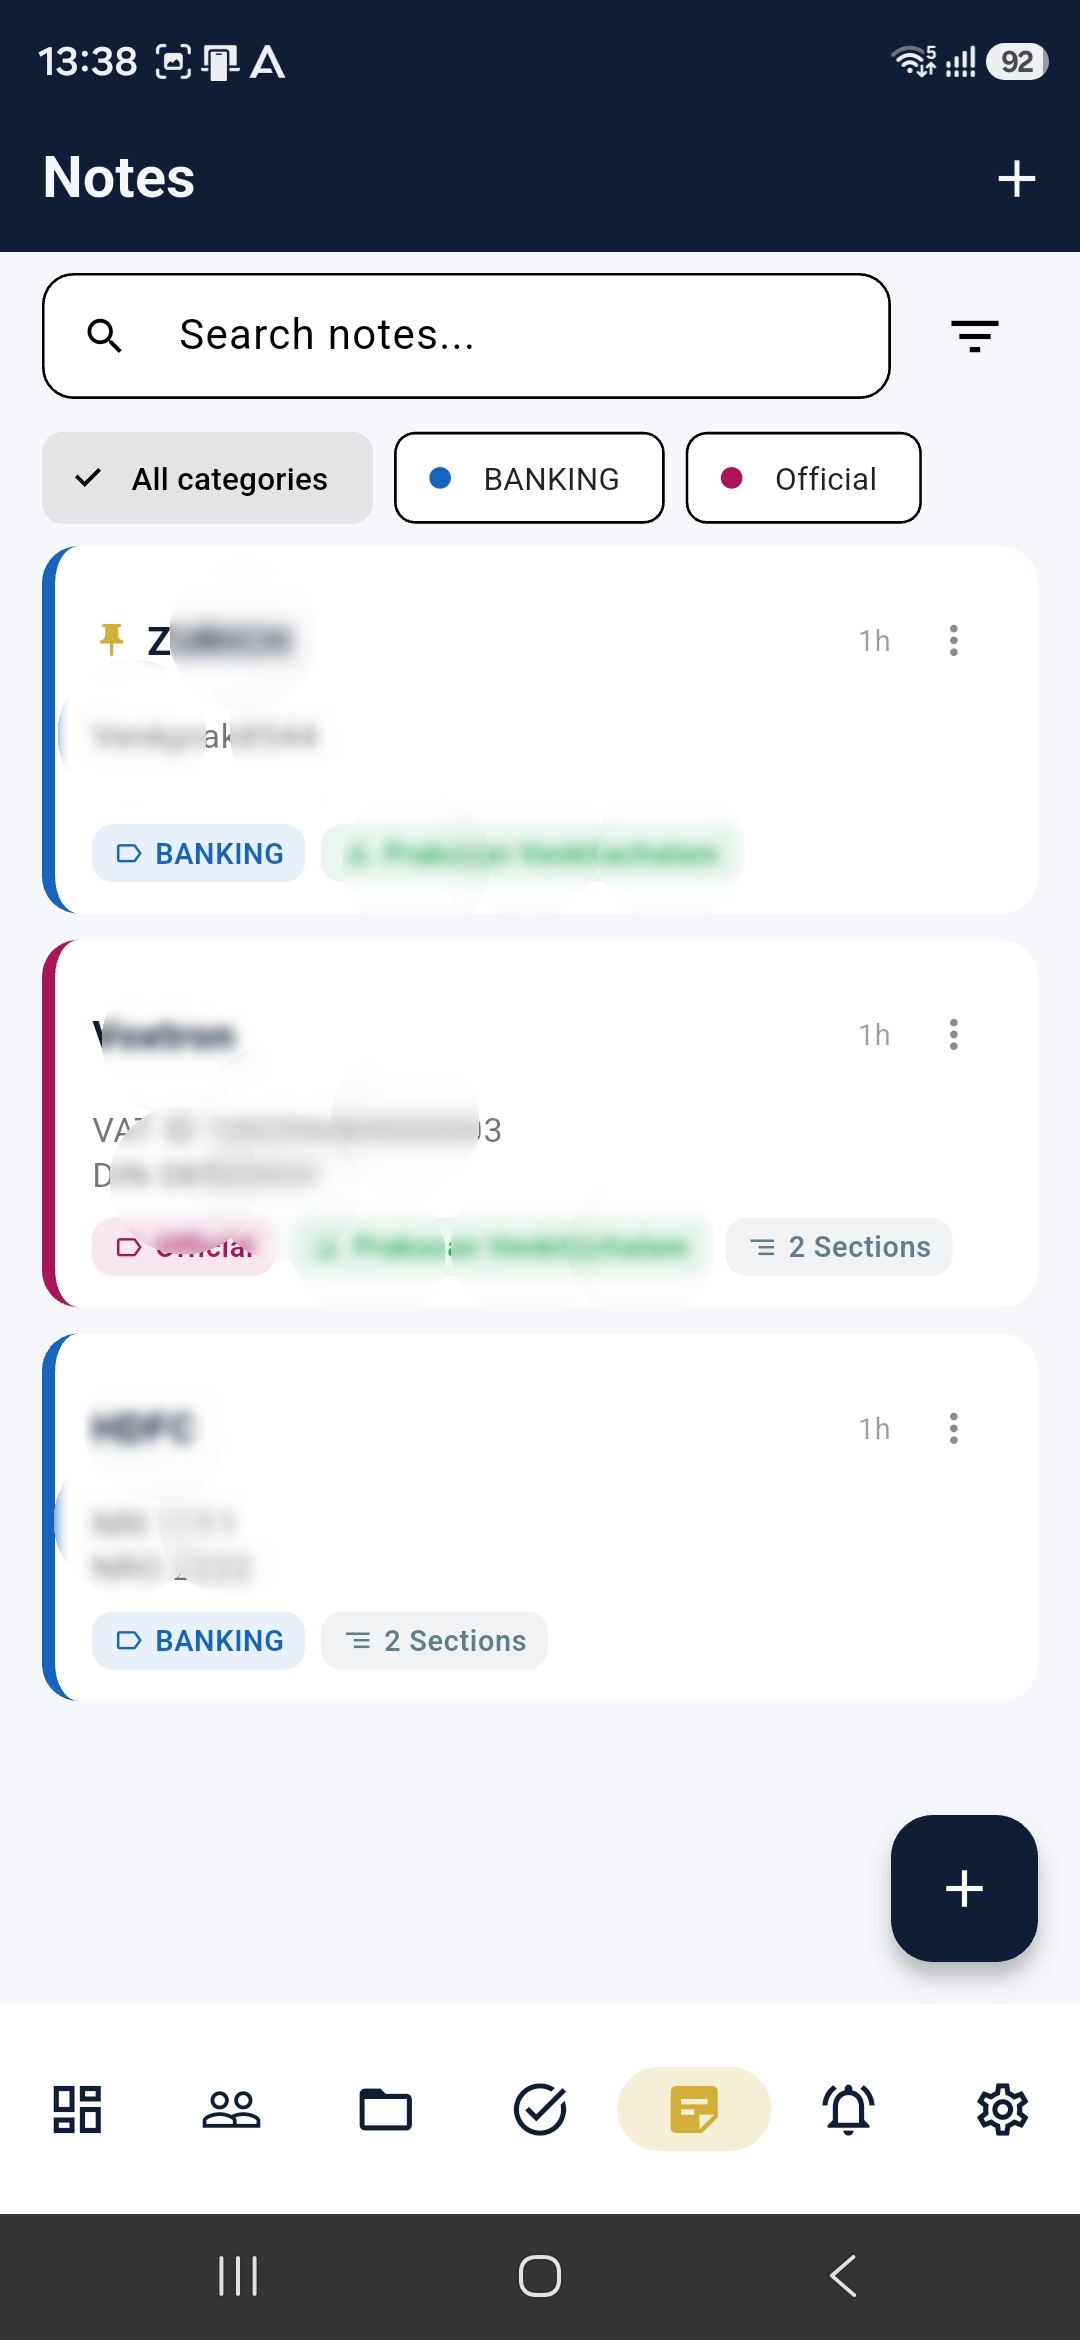
Figure 13: Notes screen showing category chips, pinned notes, and multi-section note previews.
Step 7.2: Creating & Editing a Note
Tap the floating (+) button to open the Note Editor. Fill in:
- Title — a recognisable heading for the note.
- Category — choose an existing category or create a new one with a custom colour and icon.
- Linked Profile — optionally attach the note to a family member profile.
- Content / Sections — type freely in a single content area, or add multiple labelled sections to organise related data (e.g., Account Number, IFSC Code, Branch).
Tap the Pin icon in the editor toolbar to pin the note to the top of the list. Tap the menu (⋮) on any note card to quickly Edit, Pin/Unpin, or Delete the note.
Step 7.3: Managing Note Categories
Note categories help you colour-code and filter your notes at a glance. Open the filter panel (filter icon beside the search bar) to manage categories — create a new one by entering a name and picking a colour, or delete unused categories. Deleting a category does not delete the notes inside it; they move to the default (uncategorised) group.
Security Settings & Encrypted Backups
Step 6.1: Security Toggles
In settings, enable Biometric Authentication (Face ID or Fingerprint) or set a secure PIN login to lock your My LifeVault when the app is closed.
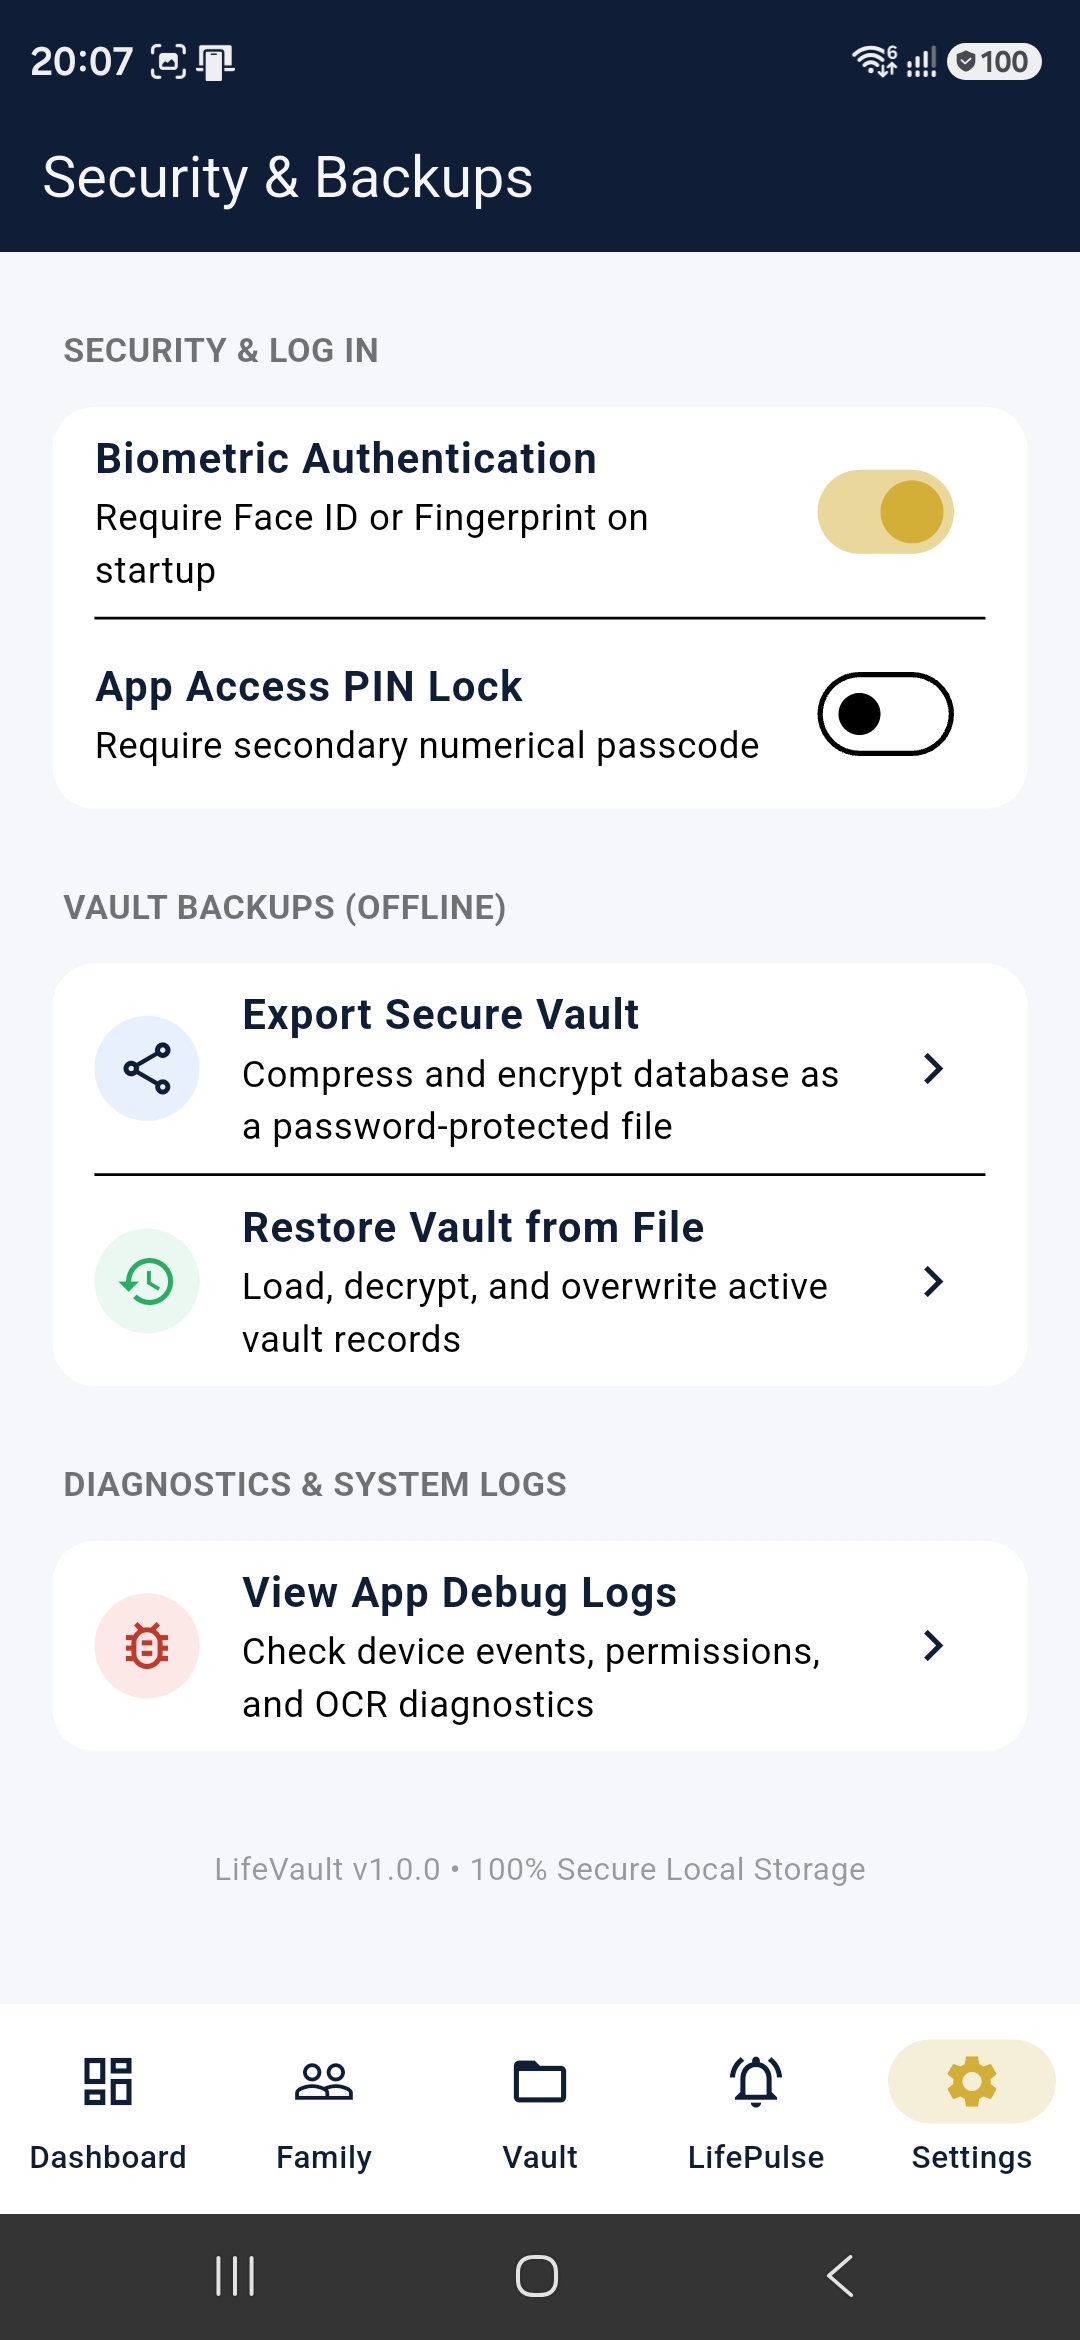
Figure 11: Security configuration panel.
Step 6.2: Create Encrypted Database Backup
My LifeVault keeps no data in the cloud. To prevent data loss, back up your database regularly:
- Go to settings and select Export Secure My LifeVault.
- Enter a password (your backup is encrypted using AES-256). Do not forget this password; it cannot be recovered.
- Save the resulting `My LifeVault` file to a secure directory (Google Drive, external drive, or secondary PC folder).
Step 6.3: Restore My LifeVault
To restore details, select Restore Secure My LifeVault from settings, locate your `My LifeVault` backup file, enter your password, and restart the application.